Thursday, August 24, 2023

Text To Video Pipeline: Python Automation (Using Open AI models)

Everybody has got ChatGPT fever, so did my Python3 installed in my Manjaro. When I researched, I found API for the ChatGPT is yet to come. Still, the process of the pipeline will be same. The seed for this idea was given by Ravi Kiran, on the first meeting we had. He is super motivated youtuber. Thanks to him.

Objective: Creating Text To Video Pipeline

To get the contents from ChatGPT or other Open-AI content generation APIs. Converting that Text into video that can be uploaded to YouTube using Google Credential API.

Three Part Story:

In order to accomplish the task three different APIs have to be explored

Open-AI api : API keys are available once you sign into your open AI account. After that, you have install openai python library in your local environment. Then we will start exploring that.

Converting Text to Audio and then to Video : There are 4 main libraries involved mutagen, gTTS, PIL and moviepy. There are lot of tutorials that explain these libraries in detail. I will not go into the details of these libraries. We will discuss how to use them together, and create a automation script

Uploading Video to Google: The YouTube API end point is not fully updated to Python 3, so the code that is provided in the Python Quickstart link is outdated. I took support of existing devs, here and here. I have shared the code below.

Easiest of the three: Open AI:

Understanding Open AI, using their API key to get the content was like cruising on the highway. Currently ChatGPT API endpoint is under waiting list. Open AI has other Content Generation models which are not that much fun like ChatGPT, but they give text content. The process we follow here will be same for ChatGPT, once the API end point is available.

We start by importing the libraries in Python, to interact with open AI api end point. Open-AI have created the Python library which makes the interaction very smooth.

import json, openai, pandas
import warnings
import os
warnings.filterwarnings('ignore')
import configparser
# Reading the credentials
readKey = configparser.ConfigParser()
readKey.read_file(open('apidata.config'))

# bringing the credentials to the python environment and store in variables
org = readKey["OPENAI"]["ORG"]
key = readKey["OPENAI"]["KEY"]

# Authenticate with the Open-AI servers
openai.organization = org
openai.api_key= key

# Start querying the API
modelList = [[data['id'],data['root']] for data in openai.Model.list()['data']]

modelList[:2]

[['babbage', 'babbage'],
['ada', 'ada'],
['davinci', 'davinci'],
['text-embedding-ada-002', 'text-embedding-ada-002'],
['babbage-code-search-text', 'babbage-code-search-text'],
['babbage-similarity', 'babbage-similarity']]

In the above code snippet, the entire authentication process with Open AI is shown. It is straight forward, and the “openai” object has the necessary methods to query the API.

Inside the Jupyter Notebook we can see the methods under openai

The ChatGPT model is still unavailable but its siblings are still available on Beta with unlimited access. They too have sufficient fire-power (model accuracy) built into them. Following is an example from “code-davinci-002”.

# Send the API request to open-ai

response = openai.Completion.create(
model="code-davinci-002",
prompt="What is AWS Redshift product",
temperature=0,
max_tokens=256,
top_p=1,
frequency_penalty=0,
presence_penalty=0
)

# converting the response to printable format
from pprint import pp
output = response["choices"][0]["text"]

# Pretty Printed output

('?Amazon Redshift is a fully managed, petabyte-scale data warehouse service '
'in the cloud. You can start with just a few hundred gigabytes of data and '
'scale to a petabyte or more. Amazon Redshift Spectrum uses the same SQL '
'syntax and JDBC/ODBC drivers as Amazon Redshift.')

The model I have used here doesn’t matter. The automation capability of the other libraries available in the ecosystem is far more important. Lets dive in…

We have to Text. At least show me Audio..

Converting the text to speech has been in production for many years. In python there are couple of libraries that do Text to Speech conversion. ESpeakng, Pyttsx3 and gTTS are the most prominent. I will be using gTTS in for this project, because ESpeakng & Pyttsx3 doesn’t work on my Linux machine :(

# pip install gTTS, moviepy, pillow, mutagen for this section

from gtts import gTTS

gttsLang = 'en'

replyObj = gTTS(text=output,lang=gttsLang,slow=False)

replyObj.save('AmazonRedshift.mp3')

That is all it takes to convert the above text to audio format. The audio can be easily identified as computer generated. If you hear the second time, you get used to the voice modulation.

Making Video: 4 step sub-routine

Okay we are one step close. How are we going to get the Video? That is where the mutagen, moviepy and PIL libraries come into picture. Ideas is as below.

Ingredients : 4 to 5 *.jpg files, Audio file

Recipe:

  1. Get a couple of images that you want to show in the video in *.jpg format, from Pixabay.
  2. Stitch those pictures using the PIL library and create a GIF
  3. Use the GIF Image and create a Video
  4. Attach the Audio that was created by gTTS with the Video to make the *.mp4 format

Code: The code below will have the comments in the required places. Rest of the regular activities will not be commented. If you have any issues with the code, please ping me. I will revert back with the answer.

from mutagen.mp3 import MP3
from PIL import Image
from pathlib import Path
from moviepy import editor
import os

#Pre requisites

get_path ='local/dir/location/openai_playground'
audio_path = "amazonRS/AmazonRedshift.mp3"
video_path = "amazonRS/AmazonRedShift.mp4"
folder_path = 'local/dir/location/openai_playground/amazonRS'
full_audio_path = os.path.join(get_path,audio_path)
full_video_path = os.path.join(get_path,video_path)

# Reading in the mp3 that we got from gTTS

song = MP3(audio_path)
audio_length = round(song.info.length)
audio_length

# Globbing the images and Stitching it to for the gif

path_images = Path(folder_path)

images = list(path_images.glob('*.jpg'))

image_list = list()

for image_name in images:
image = Image.open(image_name).resize((800, 800), Image.ANTIALIAS)
image_list.append(image)

#Checking Audio length

length_audio = audio_length
duration = int(length_audio / len(image_list)) * 1000
print(duration)

#Creating Gif

image_list[0].save(os.path.join(folder_path,"temp.gif"),
save_all=True,
append_images=image_list[1:],
duration=duration)

# Creating the video using the gif and the audio file

video = editor.VideoFileClip(os.path.join(folder_path,"temp.gif"))
print('done video')

audio = editor.AudioFileClip(full_audio_path)
print('done audio')

final_video = video.set_audio(audio)
print('Set Audio and writing')

final_video.set_fps(60)

final_video.write_videofile(full_video_path)

# The final mp4 file in the folder

$ AmazonRedShift.mp4

The above code will output the video, which you can check with the video player on your computer.
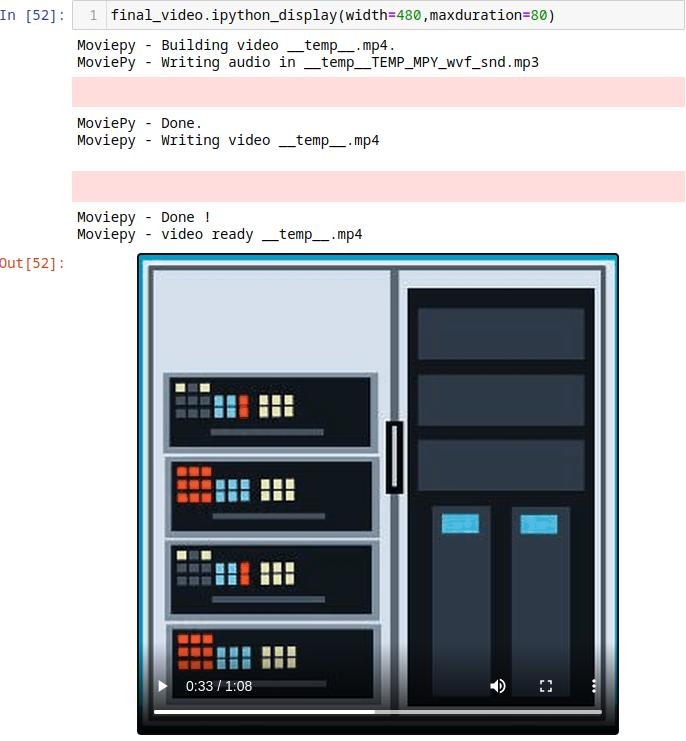
Video playing inside the Ipython Notebook

We have done the conversion from Text to Video. Next is the process of uploading the video to the YouTube Channel.

Uploading video to YouTube:

The process for getting the API keys that have necessary authorization is convoluted for the beginners. Kindly review the videos shared below and set up your API keys. Both the videos are amazing, but be patient with the devs, they take the process of learning very seriously…

Note: The code for upload.py is shared below.

Just copy and paste in a text editor and rename it as upload.py. I have tested the code and it works. I have uploaded the videos using the same. The devs in the above videos shared the code on Git Hub.

Note: There are many libraries to be installed for the below code to work. Review the import statements and install the necessary libraries. If you have questions, feel free to connect.

#!/usr/bin/python
'''Uploads a video to YouTube.'''

#Author: Nono Martínez Alonso
# youtube.com/@NonoMartinezAlonso
# https://github.com/youtube/api-samples/blob/master/python/upload_video.py

import argparse
from http import client
import httplib2
import os
import random
import time

import google.oauth2.credentials
import google_auth_oauthlib.flow
from googleapiclient.discovery import build
from googleapiclient.errors import HttpError
from googleapiclient.http import MediaFileUpload
from google_auth_oauthlib.flow import InstalledAppFlow


httplib2.RETRIES = 1

# Maximum number of times to retry before giving up.
MAX_RETRIES = 10

# Always retry when these exceptions are raised.
RETRIABLE_EXCEPTIONS = (httplib2.HttpLib2Error, IOError, client.NotConnected,
client.IncompleteRead, client.ImproperConnectionState,
client.CannotSendRequest, client.CannotSendHeader,
client.ResponseNotReady, client.BadStatusLine)

# Always retry when an apiclient.errors.HttpError with one of these status
# codes is raised.
RETRIABLE_STATUS_CODES = [500, 502, 503, 504]

CLIENT_SECRETS_FILE = 'client_secret.json'

SCOPES = ['https://www.googleapis.com/auth/youtube.upload']
API_SERVICE_NAME = 'youtube'
API_VERSION = 'v3'

VALID_PRIVACY_STATUSES = ('public', 'private', 'unlisted')


# Authorize the request and store authorization credentials.
def get_authenticated_service():
flow = InstalledAppFlow.from_client_secrets_file(
CLIENT_SECRETS_FILE, SCOPES)
credentials = flow.run_console()
return build(API_SERVICE_NAME, API_VERSION, credentials=credentials)


def initialize_upload(youtube, options):
tags = None
if options.keywords:
tags = options.keywords.split(',')

body = dict(
snippet=dict(
title=options.title,
description=options.description,
tags=tags,
categoryId=options.category
),
status=dict(
privacyStatus=options.privacyStatus
)
)

# Call the API's videos.insert method to create and upload the video.
insert_request = youtube.videos().insert(
part=','.join(body.keys()),
body=body,
media_body=MediaFileUpload(options.file, chunksize=-1, resumable=True)
)

resumable_upload(insert_request)

# This method implements an exponential backoff strategy to resume a
# failed upload.


def resumable_upload(request):
response = None
error = None
retry = 0
while response is None:
try:
print('Uploading file...')
status, response = request.next_chunk()
if response is not None:
if 'id' in response:
print('Video id "%s" was successfully uploaded.' %
response['id'])
else:
exit('The upload failed with an unexpected response: %s' % response)
except (HttpError, e):
if e.resp.status in RETRIABLE_STATUS_CODES:
error = 'A retriable HTTP error %d occurred:\n%s' % (e.resp.status,
e.content)
else:
raise
except (RETRIABLE_EXCEPTIONS, e):
error = 'A retriable error occurred: %s' % e

if error is not None:
print(error)
retry += 1
if retry > MAX_RETRIES:
exit('No longer attempting to retry.')

max_sleep = 2 ** retry
sleep_seconds = random.random() * max_sleep
print('Sleeping %f seconds and then retrying...' % sleep_seconds)
time.sleep(sleep_seconds)


if __name__ == '__main__':
parser = argparse.ArgumentParser()
parser.add_argument('--file', required=True, help='Video file to upload')
parser.add_argument('--title', help='Video title', default='Test Title')
parser.add_argument('--description', help='Video description',
default='Test Description')
parser.add_argument('--category', default='22',
help='Numeric video category. ' +
'See https://developers.google.com/youtube/v3/docs/videoCategories/list')
parser.add_argument('--keywords', help='Video keywords, comma separated',
default='')
parser.add_argument('--privacyStatus', choices=VALID_PRIVACY_STATUSES,
default='private', help='Video privacy status.')
args = parser.parse_args()

youtube = get_authenticated_service()

try:
initialize_upload(youtube, args)
except (HttpError, e):
print('An HTTP error %d occurred:\n%s' % (e.resp.status, e.content))

After that, all you have to do is target the output video.mp4 file that was created and upload it to YouTube. Using below command on your terminal

#Ensure the video is on the folder where you are executing the code

$python upload_video.py --file="Final_video.mp4" --title="Movie Names" \
--description="A lot can be done with OpenAi"\
--keywords="Amazon Redshift" \
--category="22" \
--privacyStatus="private"

You must see the video listed as private on your Youtube channel. As shown below.

The above video was created with the code shared above…

The Voice… Its Monotonic:

Ha ha.. that is the impact of using free libraries available out there. Google Cloud Voice API is available once we register for an account. There is option of using pyttsx3 library, which has better performance than gTTS. I am currently researching on that aspects. Will update once I have some interesting workarounds.

Thanks for reading…

Reference:

https://medium.com/@kamaljp/text-to-video-pipeline-python-automation-using-open-ai-models-f4341555c8d9
Tuesday, August 8, 2023

How Flutter and ChatGPT Will Change App Development


Steps for Creating a Chat-GPT Powered Flutter Application

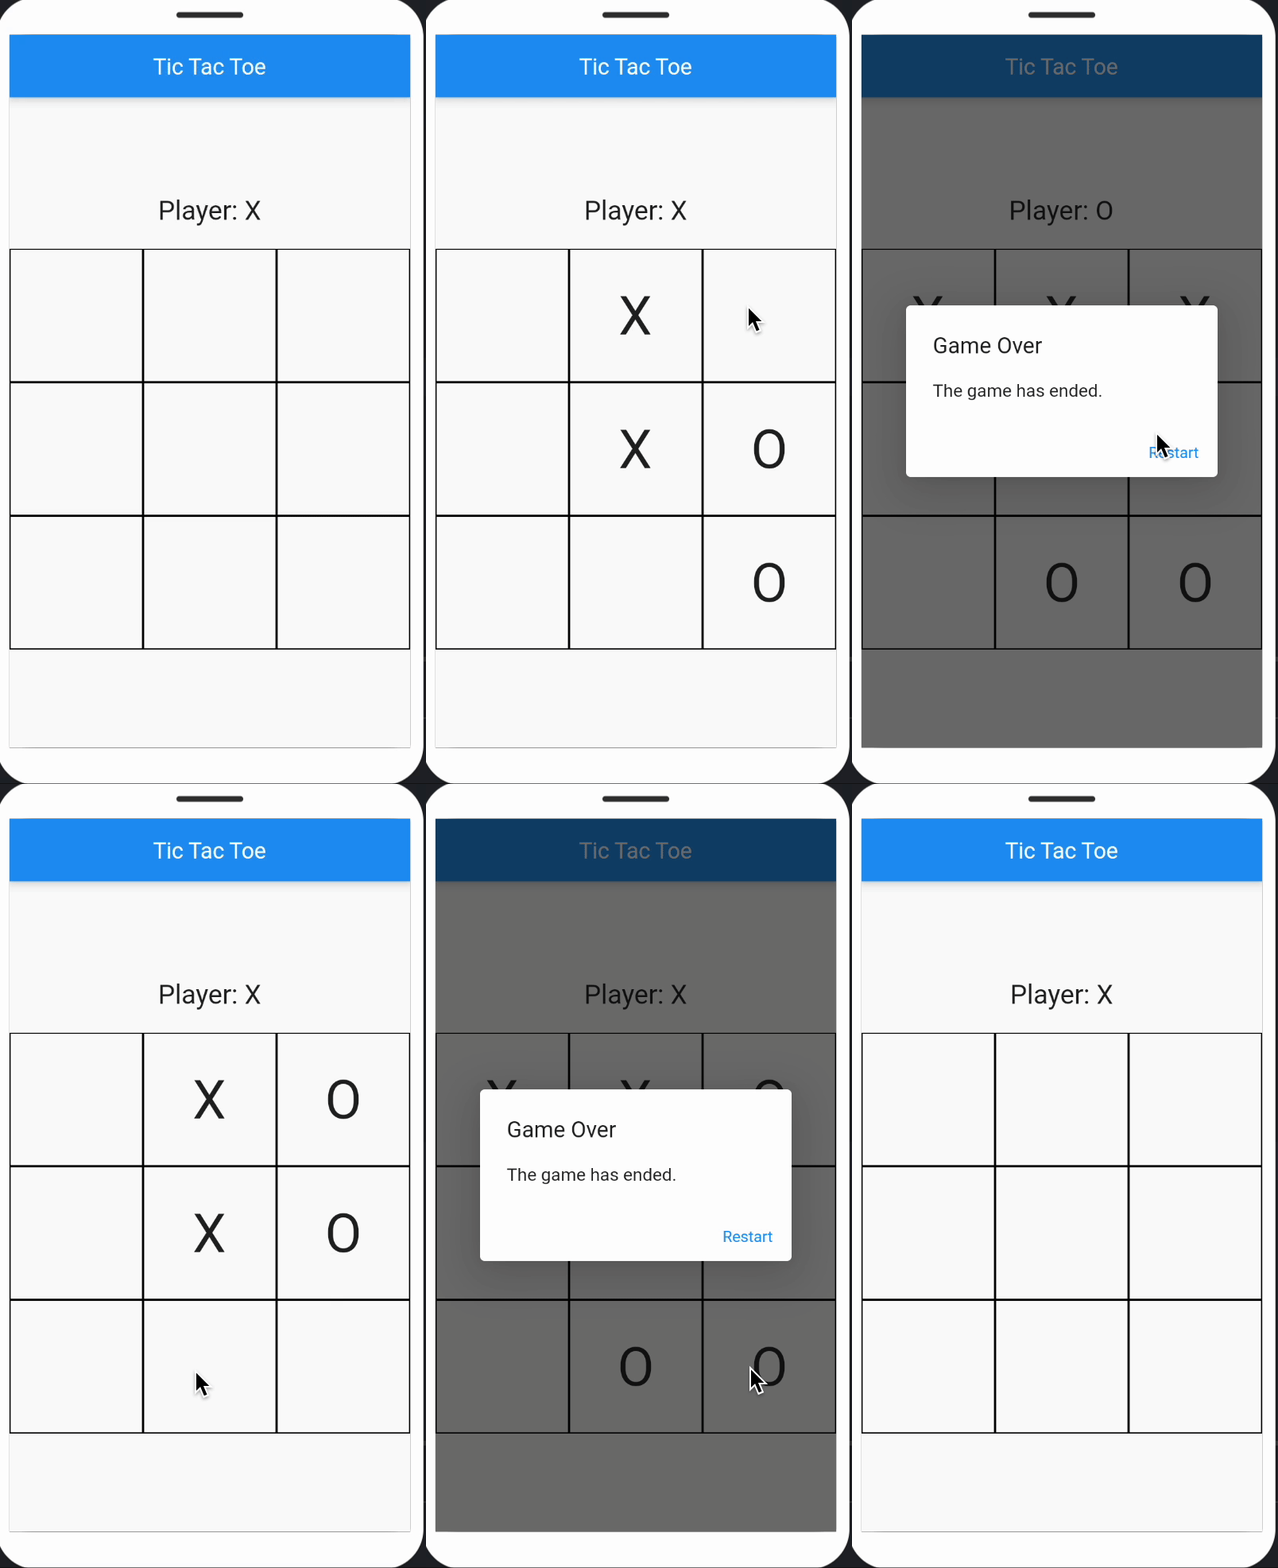
Here’s an example of a working Flutter application built using ChatGPT and Flutter.

Task: Building a Tic-Tac-Toe Game Application with Flutter

Prompt: Create a tic-tac-toe game application in Flutter. Write and explain the code briefly.

Here’s the generated code:

import 'package:flutter/material.dart';
void main() {
runApp(TicTacToeApp());
}
class TicTacToeApp extends StatelessWidget {
@override
Widget build(BuildContext context) {
return MaterialApp(
title: 'Tic Tac Toe',
theme: ThemeData(
primarySwatch: Colors.blue,
),
home: TicTacToeScreen(),
);
}
}
class TicTacToeScreen extends StatefulWidget {
@override
_TicTacToeScreenState createState() => _TicTacToeScreenState();
}
class _TicTacToeScreenState extends State<TicTacToeScreen> {
List<List<String>> _board = [];
String _currentPlayer = "";
bool _gameOver = false;
@override
void initState() {
super.initState();
_initializeBoard();
}
void _initializeBoard() {
_board = List.generate(3, (_) => List.filled(3, ''));
_currentPlayer = 'X';
_gameOver = false;
}
void _makeMove(int row, int col) {
if (_board[row][col] == '' && !_gameOver) {
setState(() {
_board[row][col] = _currentPlayer;
_checkGameStatus(row, col);
_togglePlayer();
});
}
}
void _checkGameStatus(int row, int col) {
// Check rows
for (int i = 0; i < 3; i++) {
if (_board[i][0] == _board[i][1] &&
_board[i][1] == _board[i][2] &&
_board[i][0] != '') {
_endGame();
return;
}
}
// Check columns
for (int i = 0; i < 3; i++) {
if (_board[0][i] == _board[1][i] &&
_board[1][i] == _board[2][i] &&
_board[0][i] != '') {
_endGame();
return;
}
}
// Check diagonals
if (_board[0][0] == _board[1][1] &&
_board[1][1] == _board[2][2] &&
_board[0][0] != '') {
_endGame();
return;
}
if (_board[0][2] == _board[1][1] &&
_board[1][1] == _board[2][0] &&
_board[0][2] != '') {
_endGame();
return;
}
// Check for a draw
bool isBoardFull = true;
for (int i = 0; i < 3; i++) {
for (int j = 0; j < 3; j++) {
if (_board[i][j] == '') {
isBoardFull = false;
break;
}
}
}
if (isBoardFull) {
_endGame();
}
}
void _togglePlayer() {
_currentPlayer = (_currentPlayer == 'X') ? 'O' : 'X';
}
void _endGame() {
_gameOver = true;
showDialog(
context: context,
builder: (BuildContext context) {
return AlertDialog(
title: Text('Game Over'),
content: Text('The game has ended.'),
actions: [
TextButton(
onPressed: () {
setState(() {
_initializeBoard();
Navigator.of(context).pop();
});
},
child: Text('Restart'),
),
],
);
},
);
}
@override
Widget build(BuildContext context) {
return Scaffold(
appBar: AppBar(
title: Text('Tic Tac Toe'),
),
body: Center(
child: Column(
mainAxisAlignment: MainAxisAlignment.center,
children: [
Text(
'Player: $_currentPlayer',
style: TextStyle(fontSize: 24.0),
),
SizedBox(height: 20.0),
GridView.builder(
shrinkWrap: true,
gridDelegate: SliverGridDelegateWithFixedCrossAxisCount(
crossAxisCount: 3,
),
itemCount: 9,
itemBuilder: (BuildContext context, int index) {
int row = index ~/ 3;
int col = index % 3;
return GestureDetector(
onTap: () => _makeMove(row, col),
child: Container(
decoration: BoxDecoration(
border: Border.all(color: Colors.black),
),
child: Center(
child: Text(
_board[row][col],
style: TextStyle(fontSize: 48.0),
),
),
),
);
},
),
],
),
),
);
}
}

This code provides a simple implementation of a tic-tac-toe game in Flutter. Players can make moves, and the code checks for a winner or a tie.

This is just one example of what you can do with ChatGPT and Flutter. To make this tic-tac-toe game more creative and engaging, we can integrate ChatGPT as the opponent!

Here is what you should ask chatGPT

Prompt: Create a creative tic-tac-toe application in Flutter. Where chatGPT is the opponent.

ChatGPT will explain how you can integrate it into your application using the application key.

void initializeChatGPT() {
// Initialize ChatGPT instance
chatGPT = OpenAIGPT3(
apiKey: 'YOUR_API_KEY',
defaultTemperature: 0.6,
defaultMaxTokens: 50,
);
}

In this case, you will get a worthy opponent (ChatGPT) who will have the ability to understand and respond to the player’s moves intelligently.

And voila, it’s that simple to create a Flutter application using ChatGPT!


Reference: https://blog.geekyants.com/how-flutter-and-chatgpt-will-change-app-development-86e7489d36d9


Wednesday, July 26, 2023

10 Best FlutterFlow App Templates in 2023

The world of Flutter app development is ever-evolving, offering a plethora of templates that make the job of developers easier and more efficient. Whether you’re an aspiring Flutter developer or an experienced one, these templates will undoubtedly add value to your work. Here, we’re going to explore the 10 best FlutterFlow app templates in 2023 that have the potential to accelerate your project’s development time and provide a smooth user experience.

Here are the top 10 FlutterFlow app templates that are shaping the mobile app landscape in 2023

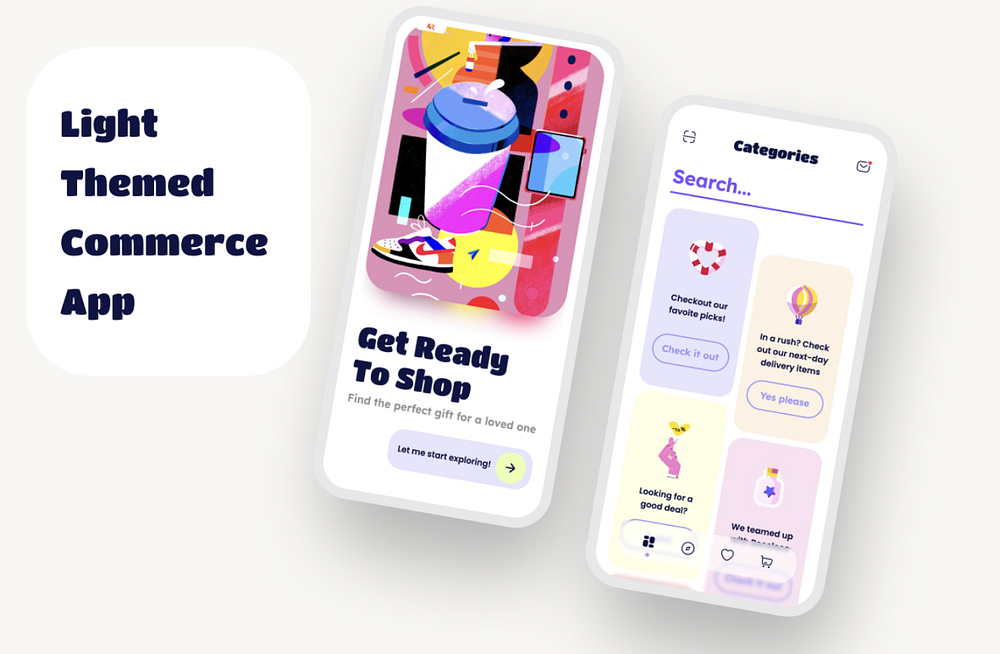
Light Themed E-commerce App

Ignite your e-commerce business with our Light Themed E-commerce App template designed specifically for FlutterFlow! This template offers a simple, visually appealing, and impactful design, enhancing the shopping experience for your customers. 🌟 Features:

📱 Simple and user-friendly e-commerce UI
🌈 Light theme for an appealing visual experience
💥 Impactful design to engage and retain users

More info

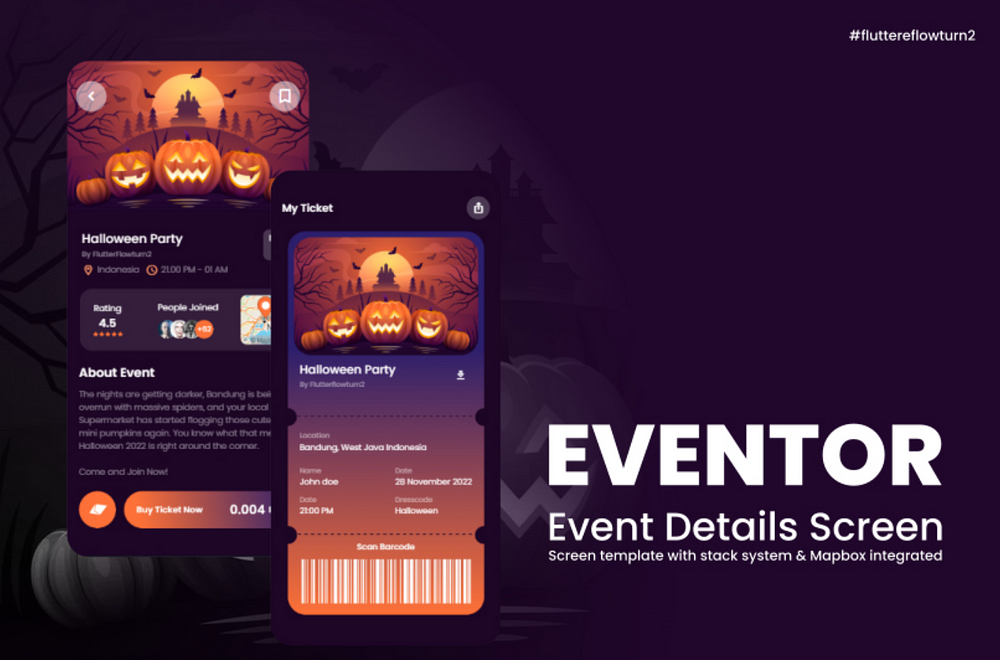
Eventor — Event Details Screen & Ticket

Presenting Eventor — an advanced event details and ticketing screen template for FlutterFlow. Built with a stack structure and integrated with Mapbox, Eventor offers an intuitive event details page and a ticket barcode feature, streamlining the ticketing process for any event. 🎫 Features:

📐1️⃣ Stack Structure: Utilize the highly versatile stack structure for a smooth and responsive user interface.
🌐2️⃣ Mapbox Integration: Enhance user experience with integrated Mapbox functionality, providing real-time location updates for events.
📅3️⃣ Event Details Page: Offer comprehensive event details in a neat and attractive layout, ensuring users have all the information they need.
🔖4️⃣ Ticket Barcode Feature: Simplify the ticketing process with an integrated ticket barcode feature, allowing users to keep track of their tickets digitally.

How to Use:

Implement the Eventor template in your project to offer an enriched event experience, complete with detailed information and seamless ticketing.

More info

Unleash the power of dynamic menu animation with our FlutterFlow Animated Menu App Template. Built on the robust foundation of page state, this template employs the versatility of stacks to bring alive the menu and content animation. Modify the background content as per your needs by updating the page component in the background. Though it’s designed as a single-page template, it’s equipped with components and app state settings, thereby functioning as an app. 😎 Features:

🎨1️⃣ Dynamic Menu Animation: Leverage the power of stacks to create lively animations for your menu and content.
🔄2️⃣ Background Content Modification: Adapt the background content to your project’s needs by updating the page component in the background.
📃3️⃣ Single Page Design: Although designed as a single page, it functions as an app due to the inclusion of components and app state settings.
💡4️⃣ Ease of Use: Download this app, copy the page to your project, and voila — you’re all set. Please remember to remove the background component (component with graph and list) before copying the page.
🚀5️⃣ Menu Animation Trigger: The menu animation is set to trigger on a page state boolean “showMenu”.

How to Use:

Simply download this app and copy the page to your project. Be sure to remove the background component (component with graph and list) prior to copying the page. It’s crucial to copy the page as the menu animation is activated via a page state boolean called “showMenu”.

More info

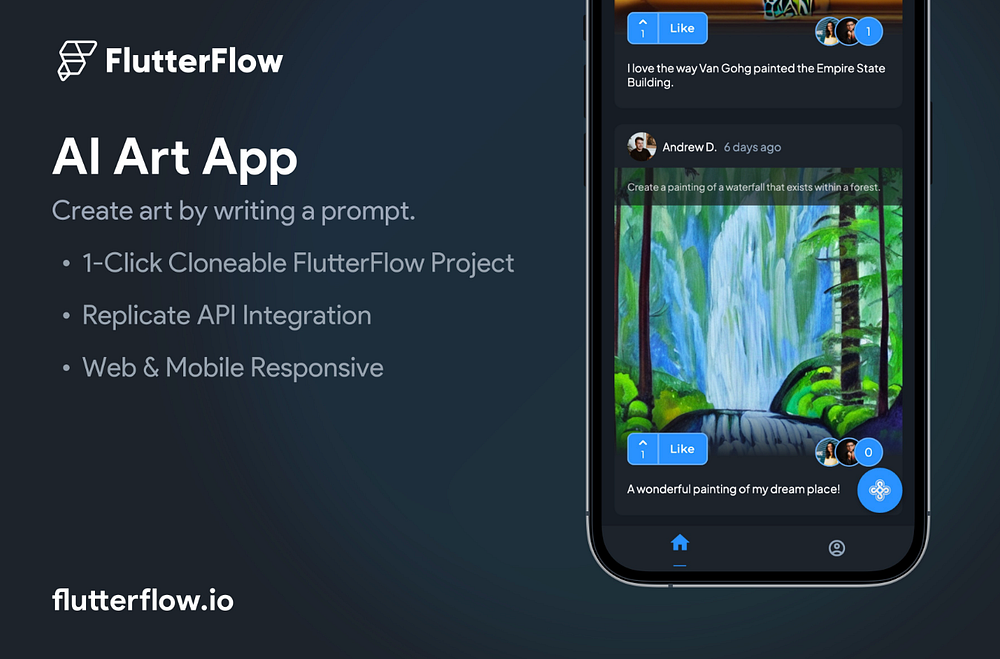
Unleash your creativity with our AI Artistry App, an innovative social media app template powered by FlutterFlow and Replicate. By merely typing an image description, users can witness the magic of Replicate’s ML model transforming their words into stunning visuals.

Features:

📝 User-friendly interface for entering image descriptions
🎨 AI-powered generation of beautiful images based on user input
🔄 Responsive app design for seamless user experience

How to Use:

1️⃣ Create a Replicate account and generate an API key
2️⃣ Retrieve your API key and navigate to the API calls section
3️⃣ Paste the API key in the Header section of each where it says API_KEY_HERE
4️⃣ Enjoy transforming your words into beautiful images!

More info

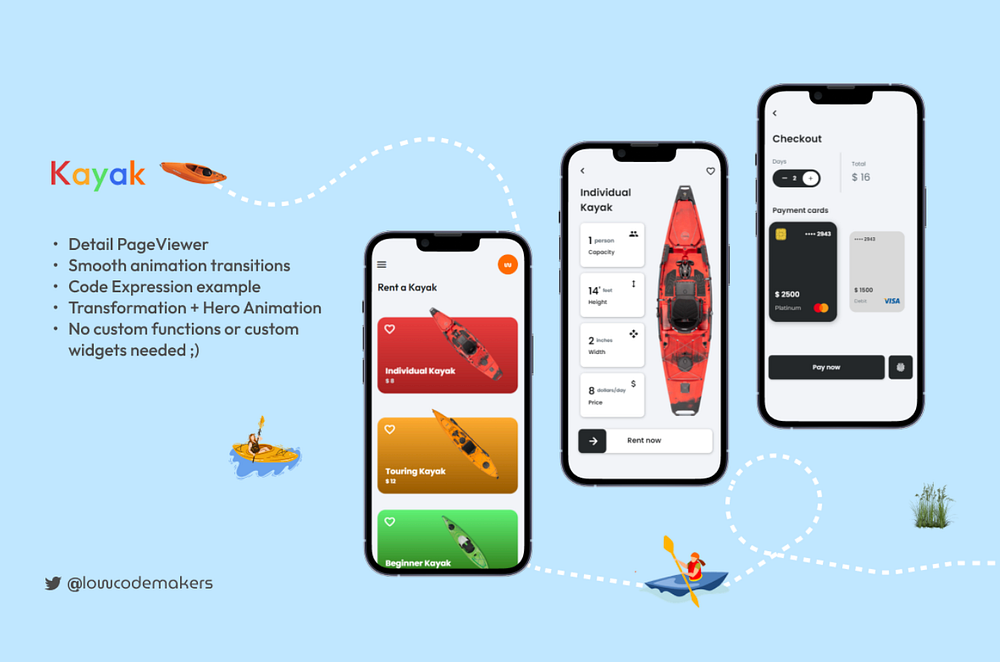
Welcome to KayakFlow, an immersive kayak rental app template crafted meticulously for a seamless user experience. Complete with cutting-edge functionalities and integrated animations, KayakFlow is perfect for businesses looking to streamline their rental services.

Features:

🛶 Detailed kayak listings for informed decisions
🔄 Integrated animations for a dynamic user experience
🛒 Smooth rental and checkout process

How to Use:

1️⃣ Select your preferred kayak from the detailed listings
2️⃣ Rent your kayak with just a few taps
3️⃣ Proceed to checkout to finalize your rental process
4️⃣ Enjoy your kayaking adventure!

More info

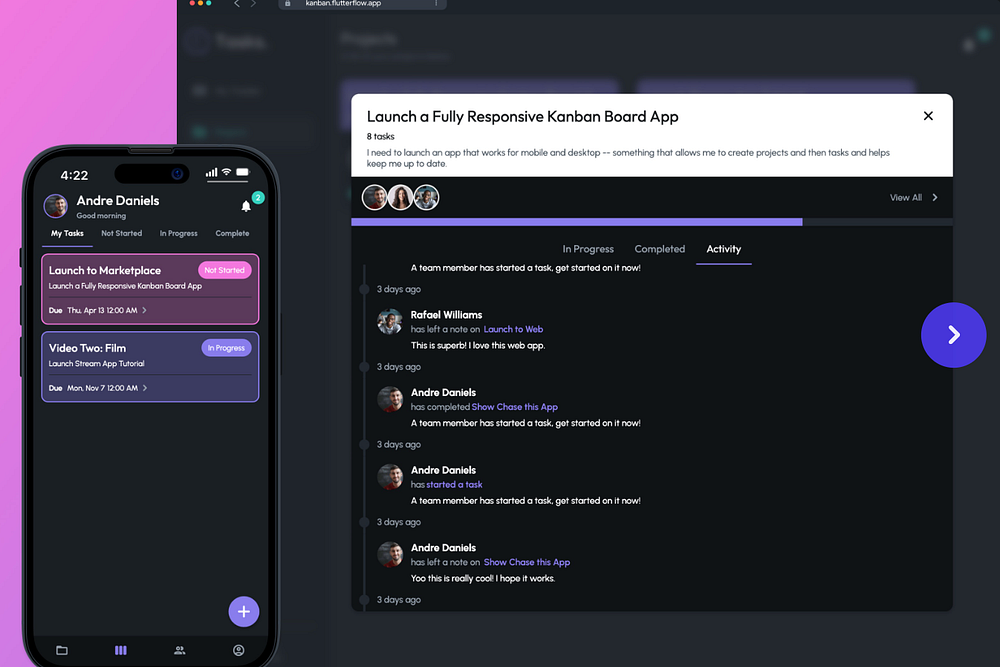
Presenting AgileFlow, a responsive Kanban Board App Template designed with the robust capabilities of FlutterFlow. Experience superior project management with this intuitive app that allows for task organization into customizable columns, and easy project prioritization across various devices.

Features:

🔄 Responsive design for seamless use on any device
📝 Customizable columns for task organization
🚀 Prioritize projects with a simple drag-and-drop interface
🔒 Firebase integration for secure and reliable data storage

How to Use:

1️⃣ Clone this project into your FlutterFlow workspace
2️⃣ Connect to your Firebase account for data management
3️⃣ Your customized Kanban Board App is ready to boost productivity!

More info

Unleash your creativity with the Sketch-to-Image FlutterFlow x Replicate App Template! Draw your vision and let Replicate’s advanced ML model transform it into a stunning image. Perfect for artists, designers, and anyone who wants to visualize their ideas quickly and easily.

Features:

✏️ User-friendly sketching interface
🧠 Powered by Replicate’s ML model
🖼️ Instantly transforms sketches into images
🔄 Quick and easy setup

How to Use:

1️⃣ Create a Replicate account and generate an API key
2️⃣ Clone this template into your FlutterFlow project
3️⃣ Paste your API key in the “Replicate API” group where it says
4️⃣ Your Sketch-to-Image app is ready to bring your visions to life!

More info

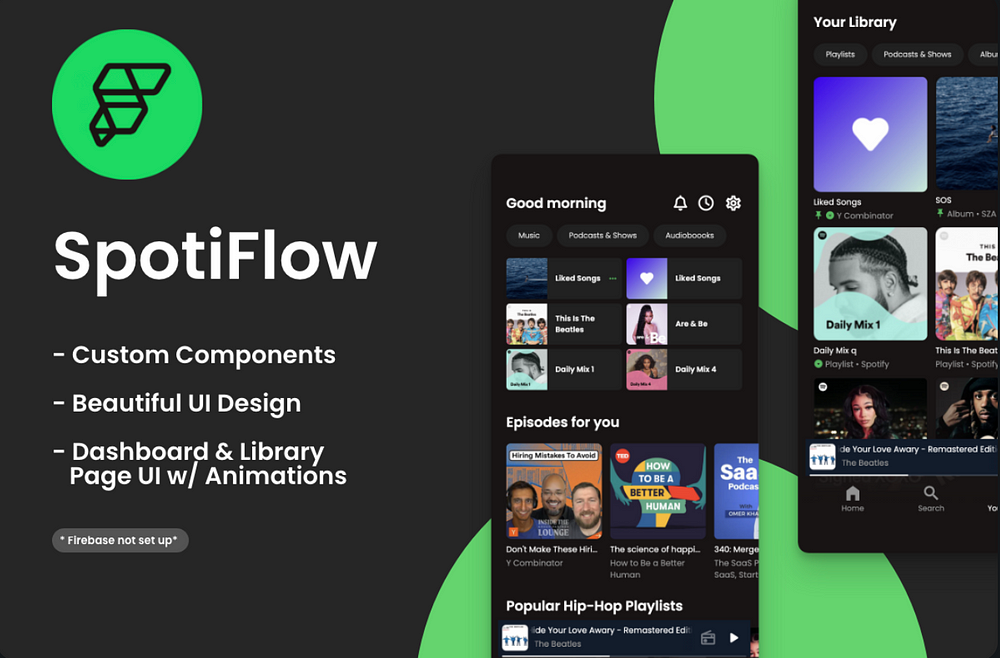
Jumpstart your custom music app development with SpotiFlow, a Spotify-inspired UI template with components and features built specifically for FlutterFlow! With this template, you can quickly utilize the pre-built UI for the Dashboard and Library page, paving the way to your ideal music app UI. Set up Firebase, add notifications, and kickstart your app in no time! How to Use:

🔥 Please note, Firebase integration is not included — you’ll need to set up Firebase according to your preferred architecture to use this within an app. This template includes the UI components/animations and navigation for a seamless development experience.

Features:

🎶 Spotify-inspired UI components for a familiar user experience
📊 Pre-built UI for Dashboard and Library page for quick setup
🔔 Add notifications to keep users engaged
🔧 Easy setup with Firebase for robust backend support
🔄 Seamless navigation for an enhanced user experience

More info

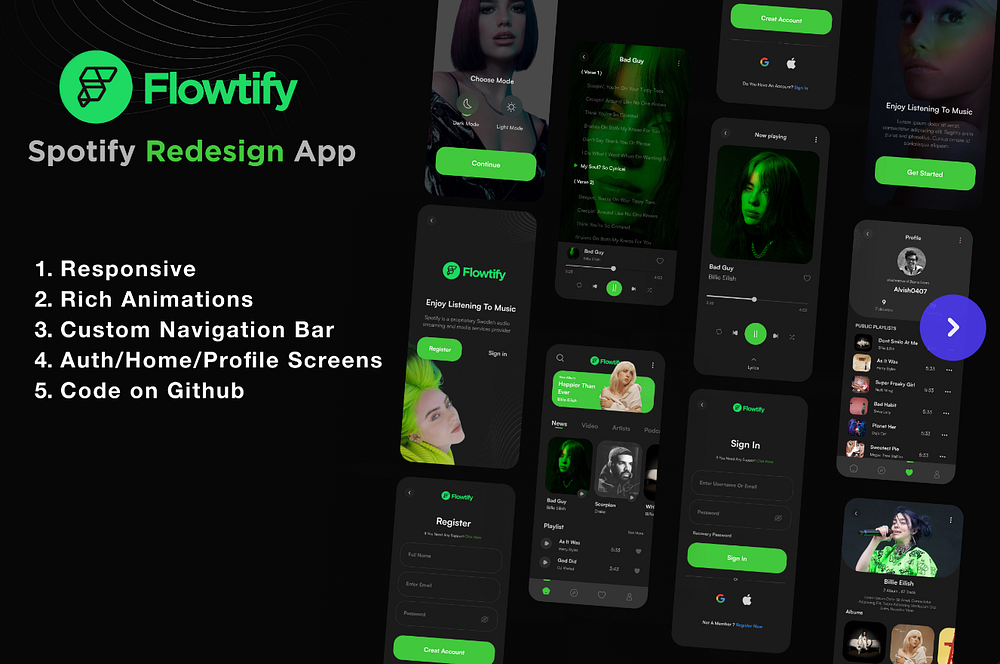
Elevate your music app development with Flowtify, a fully functional template based on Soroush Norozy’s Spotify Redesign UI, tailored for FlutterFlow. This template features a responsive design, mesmerizing animations, and a sleek, modern interface, providing an ideal starting point for your next music app project. 🌟 Features:

📱 Ready-to-use template with a responsive design that seamlessly adapts to any screen size
✨ Eye-catching animations that add a dynamic flair to your app
🚀 Quick and easy setup for a streamlined development process

Flowtify is a perfect fit for developers, designers, and entrepreneurs seeking a turnkey solution to create a unique and engaging music app. With its ready-to-use design, you can launch your app swiftly and concentrate on scaling your business. Try Flowtify today and elevate your music app experience! How to Use:

🚀 Launch your music app in no time using our sleek, modern interface and responsive design.

More info

Supercharge your automotive app development with our Tesla App template, perfectly designed for FlutterFlow. This template mimics the stunning, user-friendly interface of the renowned Tesla app, providing a seamless experience for users. Whether you’re creating an app for electric vehicles or traditional ones, this template provides a strong foundation with its intuitive navigation, sleek design, and comprehensive vehicle management features. 🌟 Features:

  • 🔋 Electric vehicle management features
  • 🌐 Intuitive navigation for easy access to features
  • 🎨 Sleek design inspired by Tesla’s own app
  • 🚀 Ideal for electric and traditional automotive apps

How to Use:

1️⃣ Clone the template into your FlutterFlow project
2️⃣ Customize the features and design to suit your vehicle range and branding
3️⃣ Your personalized Tesla-like app is ready to impress your users!

More info

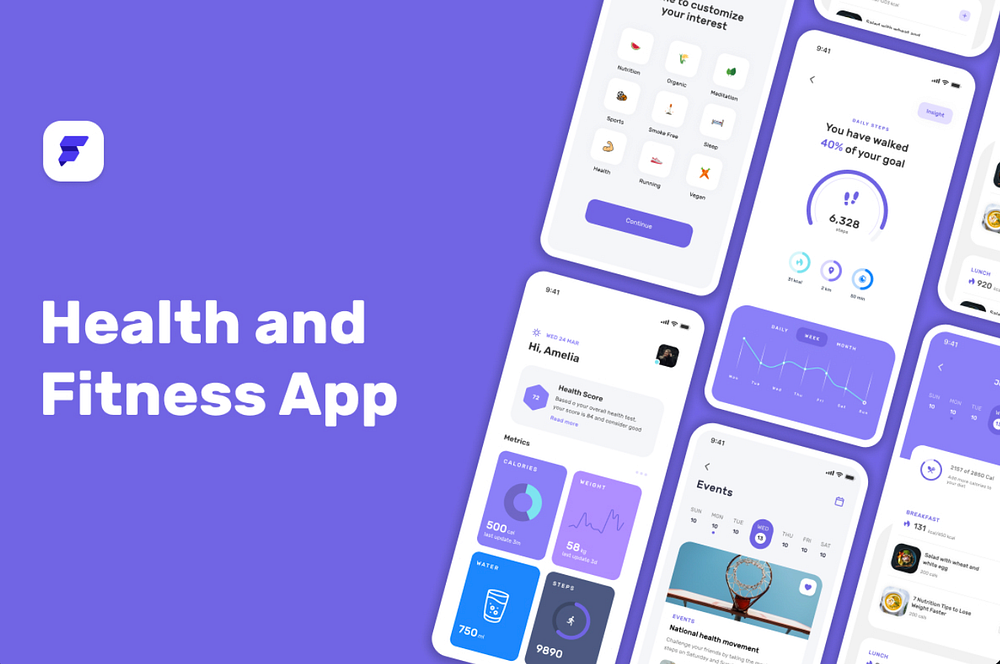
Harness the power of healthy living with our Health & Fitness App template, specifically designed for FlutterFlow. This template features a robust array of tools such as exercise tracking, meal planning, goal setting, and progress monitoring, making it an ideal solution for fitness enthusiasts and health-conscious individuals. Its sleek design and user-friendly interface make it perfect for developers aiming to create engaging and effective health and fitness apps. 🌟 Features:

🏋️‍♀️ Exercise tracking for workout management
🍽️ Meal planning for nutritional guidance
🎯 Goal setting to keep users motivated
📈 Progress monitoring for tracking improvements
🎨 Sleek design for a visually appealing user experience
👆 Easy-to-use interface for seamless navigation

More info

Chat GPT — Industry Prompter App

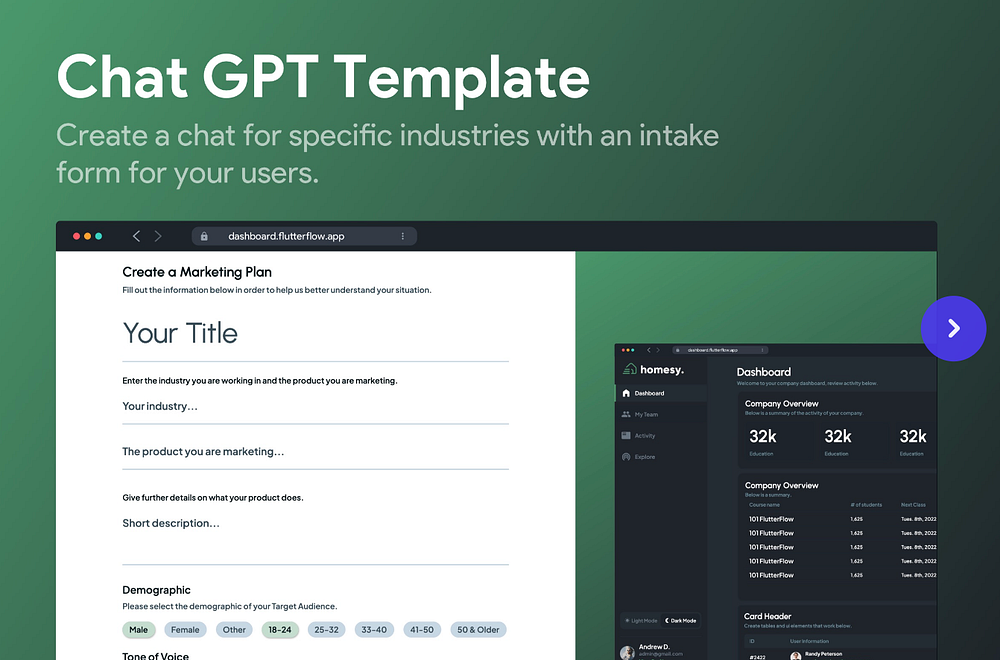
Craft a personalized user experience with our Chat GPT — Industry Prompter App template, specifically designed for FlutterFlow. This simple yet powerful app lets you generate initial prompts tailored to your users’ needs. While it currently features a marketing plan example, its flexibility allows adaptation to any industry with ease. Expand and customize it to suit your unique requirements! How to Use:

1️⃣ Copy the template into your FlutterFlow project
2️⃣ Customize the prompt content to align with your industry needs
3️⃣ Expand and enhance the features as needed
4️⃣ Your personalized Industry Prompter App is ready to engage your users!

Features

🎯 Creates industry-specific initial prompts for enhanced user experience💡 Versatile design allows application to any industry
🔧 Easily expandable and customizable to match your unique needs
🚀 Quick and easy setup for a fast-paced development process

More info

Flutter Flow marketplace provided by code.market

Are you a developer skilled in FlutterFlow? Do you have a knack for creating brilliant and functional templates? If so, code.market could be the FlutterFlow marketplace for you to not only share your work with the world but also earn income from your creations.

 Reference

 https://cdmrkt.medium.com/the-10-best-flutterflow-app-templates-in-2023-80151c0c4ace

Generate AI Images with ChatGPT


Image created with ChatGPT

You must be for sure familiar with AI tools used for image generation, such as Midjourney, Leonardo AI, Photoshop, and so on. You must also be for sure familiar with ChatGPT, which, unlike the previous tools, is mostly used for text and code generation.

But what if I tell you that you can now generate images within ChatGPT?

Well, that’s true! Now it’s possible to generate AI images using the free version of ChatGPT. Let me show you how to do it!

Step #1: Ask ChatGPT to be a prompt generator

ChatGPT won’t get what you mean if you just write ‘generate image’ (it’ll tell you that it’s not possible). So, you gotta be a little sneakier and tweak your prompt to get the job done.

Here’s the prompt we’ll use.

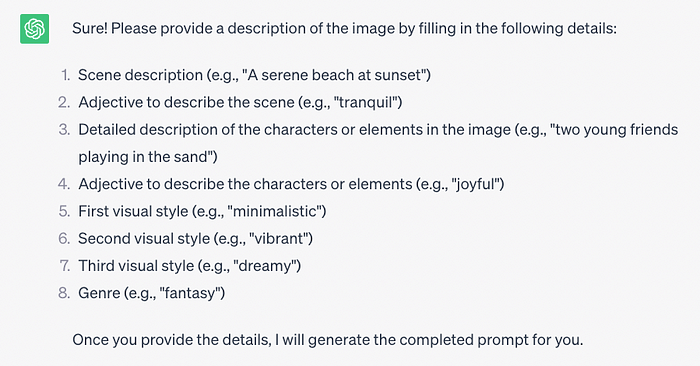
Prompt: You are an image prompt generator. First, ask me for a description of an image, and help me fill in the following. Then, output the completed prompt. ![Image] (https://image.pollinations.ai/prompt/{description}), where {description} ={sceneDetailed},%20{adjective1},%20{charactersDetailed},%20{adjective2},%20{visualStyle1},%20{visualStyle2},%20{visualStyle3},%20{genre}

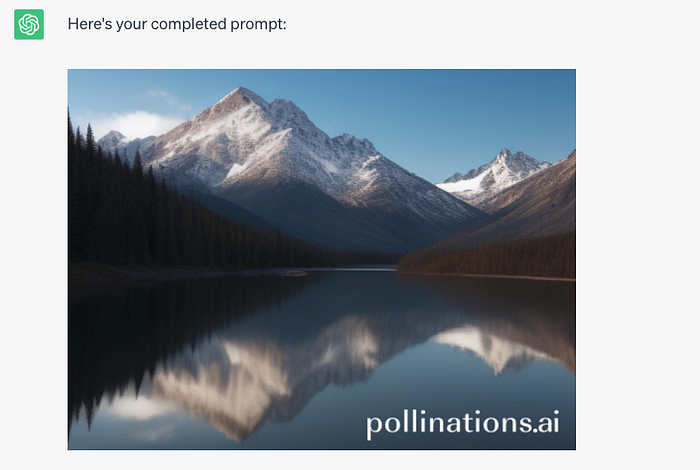
After using the prompt, you should get the following response.

Screenshot

Step #2: Provide a description of the image

Now I have to clarify what exactly I would like to see in my image. For this example, I’ll use the prompt below.

Prompt: a lake with mountains


Reference:

https://artificialcorner.com/now-you-can-generate-ai-images-with-chatgpt-heres-how-497f99c12d56

Top 8 Algorithms Every Programmer Should Know


In programming, an algorithm is a set of instructions or a procedure for solving a specific problem or achieving a specific task. Algorithms can be expressed in any programming language and can be as simple as a sequence of basic operations or as complex as a multi-step process involving different data structures and logic. The main goal of an algorithm is to take in input, process it and provide an output that is expected. Algorithms can be classified based on the time and space complexity, the technique used for solving the problem, and the type of problem it solves. Examples of algorithm are sorting, searching, graph traversals, string manipulations, mathematical operations, and many more.

Algorithms we will be talking about:

  1. Sorting algorithms: Sorting is a fundamental operation in computer science and there are several efficient algorithms for it, such as quicksort, merge sort and heap sort.
  2. Search algorithms: Searching for an element in a large dataset is a common task and there are several efficient algorithms for it, such as binary search and hash tables.
  3. Graph algorithms: Graph algorithms are used to solve problems related to graphs, such as finding the shortest path between two nodes or determining if a graph is connected.
  4. Dynamic programming: Dynamic programming is a technique for solving problems by breaking them down into smaller subproblems and storing the solutions to these subproblems to avoid redundant computation.
  5. Greedy algorithms: Greedy algorithms are used to solve optimization problems by making the locally optimal choice at each step with the hope of finding a global optimum.
  6. Divide and Conquer: Divide and Conquer is an algorithm design paradigm based on multi-branched recursion. A divide and conquer algorithm breaks down a problem into sub-problems of the same or related type, until these become simple enough to be solved directly.
  7. Backtracking: Backtracking is a general algorithmic technique that considers searching every possible combination in a systematic manner, and abandons a particular path as soon as it determines that it cannot be part of the solution.
  8. Randomized Algorithm: Randomized algorithms use randomness to solve a problem. It can be useful to solve problems that cannot be solved deterministically or to improve the average case complexity of a problem.

These algorithms are widely used in various applications and it’s important for a programmer to have a strong understanding of them. So i will try my best to explain them.

  1. Sorting algorithms:
  • Quicksort: Quicksort is a divide-and-conquer algorithm that chooses a “pivot” element from the array and partitions the other elements into two sub-arrays, according to whether they are less than or greater than the pivot. The sub-arrays are then sorted recursively.
def quicksort(arr):
if len(arr) <= 1:
return arr
pivot = arr[len(arr) // 2]
left = [x for x in arr if x < pivot]
middle = [x for x in arr if x == pivot]
right = [x for x in arr if x > pivot]
return quicksort(left) + middle + quicksort(right)

print(quicksort([3,6,8,10,1,2,1]))
  • Merge Sort: The merge sort algorithm is a divide-and-conquer algorithm that divides an array in two, sorts the two halves, and then merges them back together.
def merge_sort(arr):
if len(arr) <= 1:
return arr
mid = len(arr) // 2
left = merge_sort(arr[:mid])
right = merge_sort(arr[mid:])
return merge(left, right)

def merge(left, right):
result = []
i = 0
j = 0
while i < len(left) and j < len(right):
if left[i] < right[j]:
result.append(left[i])
i += 1
else:
result.append(right[j])
j += 1
result += left[i:]
result += right[j:]
return result
print(merge_sort([3,6,8,10,1,2,1]))
  • Heap Sort: The heap sort algorithm is a comparison-based sorting algorithm that builds a heap from the input elements and then repeatedly extracts the maximum element from the heap and places it at the end of the sorted output array.
def heap_sort(arr):
n = len(arr)
for i in range(n, -1, -1):
heapify(arr, n, i)
for i in range(n-1, 0, -1):
arr[i], arr[0] = arr[0], arr[i]
heapify(arr, i, 0)

def heapify(arr, n, i):
largest = i
l = 2 * i + 1
r = 2 * i + 2
if l < n and arr[i] < arr[l]:
largest = l
if r < n and arr[largest] < arr[r]:
largest = r
if largest != i:
arr[i], arr[largest] = arr[largest], arr[i]
heapify(arr, n, largest)
print(heap_sort([3,6,8,10,1,2,1]))

2. Search algorithms:

  • Binary Search: Binary search is an efficient algorithm for finding an item from a sorted list of items. It works by repeatedly dividing in half the portion of the array being searched, until the target value is found.
def binary_search(arr, x):
low = 0
high = len(arr) - 1
mid = 0
while low <= high:
mid = (high + low) // 2
if arr[mid] < x:
low = mid + 1
elif arr[mid] > x:
high = mid - 1
else:
return mid
return -1
print(binary_search([1,2,3,4,5,6,7], 4))
  • Hash Tables: A hash table is a data structure that maps keys to values, using a hash function to compute an index into an array of buckets or slots, from which the desired value can be found.
class HashTable:
def __init__(self):
self.size = 10
self.keys = [None] * self.size
self.values = [None] * self.size

def put(self, key, data):
index = self.hash_function(key)
while self.keys[index] is not None:
if self.keys[index] == key:
self.values[index] = data # update
return
index = (index + 1) % self.size
self.keys[index] = key
self.values[index] = data

def get(self, key):
index = self.hash_function(key)
while self.keys[index] is not None:
if self.keys[index] == key:
return self.values[index]
index = (index + 1) % self.size
return None

def hash_function(self, key):
sum = 0
for pos in range(len(key)):
sum = sum + ord(key[pos])
return sum % self.size

t = HashTable()
t.put("apple", 10)
t.put("orange", 20)
t.put("banana", 30)
print(t.get("orange"))

3. Graph Algorithm :

  • Dijkstra’s shortest path algorithm: Dijkstra’s shortest path algorithm is an algorithm for finding the shortest path between nodes in a graph.
import heapq

def dijkstra(graph, start):
heap = [(0, start)]
visited = set()
while heap:
(cost, v) = heapq.heappop(heap)
if v not in visited:
visited.add(v)
for u, c in graph[v].items():
if u not in visited:
heapq.heappush(heap, (cost + c, u))
return visited

graph = {
'A': {'B': 2, 'C': 3},
'B': {'D': 4, 'E': 5},
'C': {'F': 6},
'D': {'G': 7},
'E': {'G': 8, 'H': 9},
'F': {'H': 10},
'G': {},
'H': {}
}
print(dijkstra(graph, 'A'))

4. Dynamic Programming:

  • Fibonacci sequence: A classic example of a problem that can be solved using dynamic programming is the Fibonacci sequence.
def fibonacci(n):
if n <= 0:
return 0
elif n == 1:
return 1
else:
return fibonacci(n-1) + fibonacci(n-2)


print(fibonacci(10))

5. Greedy Algorithms:

  • Huffman coding: Huffman coding is a lossless data compression algorithm that uses a greedy algorithm to construct a prefix code for a given set of symbols.
from collections import Counter, namedtuple

def huffman_encoding(data):
"""
Generates a Huffman encoded string of the input data
"""
# Create a frequency counter for the data
freq_counter = Counter(data)
# Create a namedtuple for the Huffman tree nodes
HuffmanNode = namedtuple("HuffmanNode", ["char", "freq"])
# Create a priority queue for the Huffman tree
priority_queue = PriorityQueue()
# Add all characters to the priority queue
for char, freq in freq_counter.items():
priority_queue.put(HuffmanNode(char, freq))
# Combine nodes until only the root node remains
while priority_queue.qsize() > 1:
left_node = priority_queue.get()
right_node = priority_queue.get()
combined_freq = left_node.freq + right_node.freq
combined_node = HuffmanNode(None, combined_freq)
priority_queue.put(combined_node)
# Generate the Huffman code for each character
huffman_code = {}
generate_code(priority_queue.get(), "", huffman_code)
# Encode the input data
encoded_data = ""
for char in data:
encoded_data += huffman_code[char]
return encoded_data, huffman_code
print(huffman_encoding("aaaaabbbcccc"))

6. Divide and Conquer :

  • Merge Sort: already explained above

7. Backtracking:

  • The N-Queens Problem: The N-Queens problem is a classic problem that can be solved using backtracking. The goal is to place N queens on an NxN chessboard in such a way that no queen can attack any other queen.
def solveNQueens(n):
def could_place(row, col):
# check if a queen can be placed on board[row][col]
# check if this row is not under attack from any previous queen in that column
for i in range(row):
if board[i] == col or abs(board[i] - col) == abs(i - row):
return False
return True

def backtrack(row=0, count=0):
for col in range(n):
if could_place(row, col):
board[row] = col
if row + 1 == n:
count += 1
else:
count = backtrack(row + 1, count)
return count
board = [-1 for x in range(n)]
return backtrack()
print(solveNQueens(4))

This algorithm starts placing queens in the first row, and for every placed queen it checks if it is under attack from any previous queen. If not, it proceeds to the next row and repeats the process. If a queen is placed in a position where it is under attack, the algorithm backtracks and tries a different position. This continues until all queens are placed on the board without any attacking each other.

8. Randomized Algorithm: — Randomized QuickSort: A variation of quicksort algorithm where pivot is chosen randomly.

import random

def randomized_quicksort(arr):
if len(arr) <= 1:
return arr
pivot = random.choice(arr)
left = [x for x in arr if x < pivot]
middle = [x for x in arr if x == pivot]
right = [x for x in arr if x > pivot]
return randomized_quicksort(left) + middle + randomized_quicksort(right)

print(randomized_quicksort([3,6,8,10,1,2,1]))

These are some of the most commonly used algorithms that every programmer should be familiar with. Understanding these algorithms and their implementation can help a programmer to make better decisions when it comes to designing and implementing efficient solutions.

 Reference:

https://python.plainenglish.io/top-8-algorithms-every-programmer-should-know-93c826267938