Everybody has got ChatGPT fever, so did my Python3 installed in my Manjaro. When I researched, I found API for the ChatGPT is yet to come. Still, the process of the pipeline will be same. The seed for this idea was given by Ravi Kiran, on the first meeting we had. He is super motivated youtuber. Thanks to him.
Objective: Creating Text To Video Pipeline
To get the contents from ChatGPT or other Open-AI content generation APIs. Converting that Text into video that can be uploaded to YouTube using Google Credential API.
Three Part Story:
In order to accomplish the task three different APIs have to be explored
— Open-AI api : API keys are available once you sign into your open AI account. After that, you have install openai python library in your local environment. Then we will start exploring that.
— Converting Text to Audio and then to Video : There are 4 main libraries involved mutagen, gTTS, PIL and moviepy. There are lot of tutorials that explain these libraries in detail. I will not go into the details of these libraries. We will discuss how to use them together, and create a automation script
— Uploading Video to Google: The YouTube API end point is not fully updated to Python 3, so the code that is provided in the Python Quickstart link is outdated. I took support of existing devs, here and here. I have shared the code below.
Easiest of the three: Open AI:
Understanding Open AI, using their API key to get the content was like cruising on the highway. Currently ChatGPT API endpoint is under waiting list. Open AI has other Content Generation models which are not that much fun like ChatGPT, but they give text content. The process we follow here will be same for ChatGPT, once the API end point is available.
We start by importing the libraries in Python, to interact with open AI api end point. Open-AI have created the Python library which makes the interaction very smooth.
import json, openai, pandas
import warnings
import os
warnings.filterwarnings('ignore')
import configparser
# Reading the credentials
readKey = configparser.ConfigParser()
readKey.read_file(open('apidata.config'))
# bringing the credentials to the python environment and store in variables
org = readKey["OPENAI"]["ORG"]
key = readKey["OPENAI"]["KEY"]
# Authenticate with the Open-AI servers
openai.organization = org
openai.api_key= key
# Start querying the API
modelList = [[data['id'],data['root']] for data in openai.Model.list()['data']]
modelList[:2]
[['babbage', 'babbage'],
['ada', 'ada'],
['davinci', 'davinci'],
['text-embedding-ada-002', 'text-embedding-ada-002'],
['babbage-code-search-text', 'babbage-code-search-text'],
['babbage-similarity', 'babbage-similarity']]In the above code snippet, the entire authentication process with Open AI is shown. It is straight forward, and the “openai” object has the necessary methods to query the API.

The ChatGPT model is still unavailable but its siblings are still available on Beta with unlimited access. They too have sufficient fire-power (model accuracy) built into them. Following is an example from “code-davinci-002”.
# Send the API request to open-ai

response = openai.Completion.create(
  model="code-davinci-002",
  prompt="What is AWS Redshift product",
  temperature=0,
  max_tokens=256,
  top_p=1,
  frequency_penalty=0,
  presence_penalty=0
)

# converting the response to printable format
from pprint import pp
output = response["choices"][0]["text"]

# Pretty Printed output

('?Amazon Redshift is a fully managed, petabyte-scale data warehouse service '
 'in the cloud. You can start with just a few hundred gigabytes of data and '
 'scale to a petabyte or more. Amazon Redshift Spectrum uses the same SQL '
 'syntax and JDBC/ODBC drivers as Amazon Redshift.')
The model I have used here doesn’t matter. The automation capability of the other libraries available in the ecosystem is far more important. Lets dive in…
We have to Text. At least show me Audio..
Converting the text to speech has been in production for many years. In python there are couple of libraries that do Text to Speech conversion. ESpeakng, Pyttsx3 and gTTS are the most prominent. I will be using gTTS in for this project, because ESpeakng & Pyttsx3 doesn’t work on my Linux machine :(
# pip install gTTS, moviepy, pillow, mutagen for this section

from gtts import gTTS

gttsLang = 'en'

replyObj = gTTS(text=output,lang=gttsLang,slow=False)

replyObj.save('AmazonRedshift.mp3')
That is all it takes to convert the above text to audio format. The audio can be easily identified as computer generated. If you hear the second time, you get used to the voice modulation.
Making Video: 4 step sub-routine
Okay we are one step close. How are we going to get the Video? That is where the mutagen, moviepy and PIL libraries come into picture. Ideas is as below.
Ingredients : 4 to 5 *.jpg files, Audio file
Recipe:
- Get a couple of images that you want to show in the video in *.jpg format, from Pixabay.
- Stitch those pictures using the PIL library and create a GIF
- Use the GIF Image and create a Video
- Attach the Audio that was created by gTTS with the Video to make the *.mp4 format
Code: The code below will have the comments in the required places. Rest of the regular activities will not be commented. If you have any issues with the code, please ping me. I will revert back with the answer.
from mutagen.mp3 import MP3
from PIL import Image
from pathlib import Path
from moviepy import editor
import os
#Pre requisites
get_path ='local/dir/location/openai_playground'
audio_path = "amazonRS/AmazonRedshift.mp3"
video_path = "amazonRS/AmazonRedShift.mp4"
folder_path = 'local/dir/location/openai_playground/amazonRS'
full_audio_path = os.path.join(get_path,audio_path)
full_video_path = os.path.join(get_path,video_path)
# Reading in the mp3 that we got from gTTS
song = MP3(audio_path)
audio_length = round(song.info.length)
audio_length
# Globbing the images and Stitching it to for the gif
path_images = Path(folder_path)
images = list(path_images.glob('*.jpg'))
image_list = list()
for image_name in images:
image = Image.open(image_name).resize((800, 800), Image.ANTIALIAS)
image_list.append(image)
#Checking Audio length
length_audio = audio_length
duration = int(length_audio / len(image_list)) * 1000
print(duration)
#Creating Gif
image_list[0].save(os.path.join(folder_path,"temp.gif"),
save_all=True,
append_images=image_list[1:],
duration=duration)
# Creating the video using the gif and the audio file
video = editor.VideoFileClip(os.path.join(folder_path,"temp.gif"))
print('done video')
audio = editor.AudioFileClip(full_audio_path)
print('done audio')
final_video = video.set_audio(audio)
print('Set Audio and writing')
final_video.set_fps(60)
final_video.write_videofile(full_video_path)
# The final mp4 file in the folder
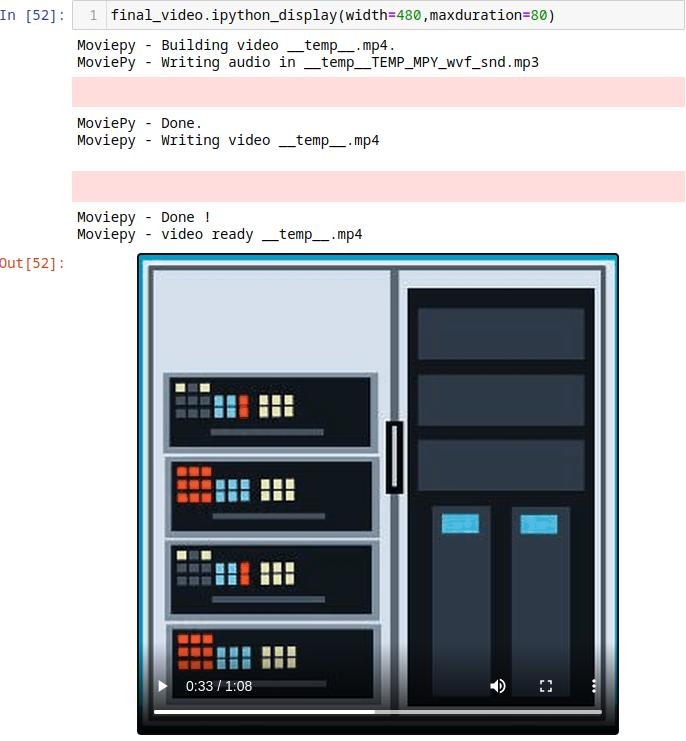
$ AmazonRedShift.mp4The above code will output the video, which you can check with the video player on your computer.
We have done the conversion from Text to Video. Next is the process of uploading the video to the YouTube Channel.
Uploading video to YouTube:
The process for getting the API keys that have necessary authorization is convoluted for the beginners. Kindly review the videos shared below and set up your API keys. Both the videos are amazing, but be patient with the devs, they take the process of learning very seriously…
Note: The code for upload.py is shared below.
Just copy and paste in a text editor and rename it as upload.py. I have tested the code and it works. I have uploaded the videos using the same. The devs in the above videos shared the code on Git Hub.
Note: There are many libraries to be installed for the below code to work. Review the import statements and install the necessary libraries. If you have questions, feel free to connect.
#!/usr/bin/python
'''Uploads a video to YouTube.'''

#Author: Nono Martínez Alonso
# youtube.com/@NonoMartinezAlonso
# https://github.com/youtube/api-samples/blob/master/python/upload_video.py

import argparse
from http import client
import httplib2
import os
import random
import time

import google.oauth2.credentials
import google_auth_oauthlib.flow
from googleapiclient.discovery import build
from googleapiclient.errors import HttpError
from googleapiclient.http import MediaFileUpload
from google_auth_oauthlib.flow import InstalledAppFlow


httplib2.RETRIES = 1

# Maximum number of times to retry before giving up.
MAX_RETRIES = 10

# Always retry when these exceptions are raised.
RETRIABLE_EXCEPTIONS = (httplib2.HttpLib2Error, IOError, client.NotConnected,
                        client.IncompleteRead, client.ImproperConnectionState,
                        client.CannotSendRequest, client.CannotSendHeader,
                        client.ResponseNotReady, client.BadStatusLine)

# Always retry when an apiclient.errors.HttpError with one of these status
# codes is raised.
RETRIABLE_STATUS_CODES = [500, 502, 503, 504]

CLIENT_SECRETS_FILE = 'client_secret.json'

SCOPES = ['https://www.googleapis.com/auth/youtube.upload']
API_SERVICE_NAME = 'youtube'
API_VERSION = 'v3'

VALID_PRIVACY_STATUSES = ('public', 'private', 'unlisted')


# Authorize the request and store authorization credentials.
def get_authenticated_service():
    flow = InstalledAppFlow.from_client_secrets_file(
        CLIENT_SECRETS_FILE, SCOPES)
    credentials = flow.run_console()
    return build(API_SERVICE_NAME, API_VERSION, credentials=credentials)


def initialize_upload(youtube, options):
    tags = None
    if options.keywords:
        tags = options.keywords.split(',')

    body = dict(
        snippet=dict(
            title=options.title,
            description=options.description,
            tags=tags,
            categoryId=options.category
        ),
        status=dict(
            privacyStatus=options.privacyStatus
        )
    )

    # Call the API's videos.insert method to create and upload the video.
    insert_request = youtube.videos().insert(
        part=','.join(body.keys()),
        body=body,
        media_body=MediaFileUpload(options.file, chunksize=-1, resumable=True)
    )

    resumable_upload(insert_request)

# This method implements an exponential backoff strategy to resume a
# failed upload.


def resumable_upload(request):
    response = None
    error = None
    retry = 0
    while response is None:
        try:
            print('Uploading file...')
            status, response = request.next_chunk()
            if response is not None:
                if 'id' in response:
                    print('Video id "%s" was successfully uploaded.' %
                          response['id'])
                else:
                    exit('The upload failed with an unexpected response: %s' % response)
        except (HttpError, e):
            if e.resp.status in RETRIABLE_STATUS_CODES:
                error = 'A retriable HTTP error %d occurred:\n%s' % (e.resp.status,
                                                                     e.content)
            else:
                raise
        except (RETRIABLE_EXCEPTIONS, e):
            error = 'A retriable error occurred: %s' % e

        if error is not None:
            print(error)
            retry += 1
            if retry > MAX_RETRIES:
                exit('No longer attempting to retry.')

            max_sleep = 2 ** retry
            sleep_seconds = random.random() * max_sleep
            print('Sleeping %f seconds and then retrying...' % sleep_seconds)
            time.sleep(sleep_seconds)


if __name__ == '__main__':
    parser = argparse.ArgumentParser()
    parser.add_argument('--file', required=True, help='Video file to upload')
    parser.add_argument('--title', help='Video title', default='Test Title')
    parser.add_argument('--description', help='Video description',
                        default='Test Description')
    parser.add_argument('--category', default='22',
                        help='Numeric video category. ' +
                        'See https://developers.google.com/youtube/v3/docs/videoCategories/list')
    parser.add_argument('--keywords', help='Video keywords, comma separated',
                        default='')
    parser.add_argument('--privacyStatus', choices=VALID_PRIVACY_STATUSES,
                        default='private', help='Video privacy status.')
    args = parser.parse_args()

    youtube = get_authenticated_service()

    try:
        initialize_upload(youtube, args)
    except (HttpError, e):
        print('An HTTP error %d occurred:\n%s' % (e.resp.status, e.content))
After that, all you have to do is target the output video.mp4 file that was created and upload it to YouTube. Using below command on your terminal
#Ensure the video is on the folder where you are executing the code

$python upload_video.py --file="Final_video.mp4" --title="Movie Names" \
                                  --description="A lot can be done with OpenAi"\
                              --keywords="Amazon Redshift" \
                                  --category="22" \
                                  --privacyStatus="private"
You must see the video listed as private on your Youtube channel. As shown below.
The Voice… Its Monotonic:
Ha ha.. that is the impact of using free libraries available out there. Google Cloud Voice API is available once we register for an account. There is option of using pyttsx3 library, which has better performance than gTTS. I am currently researching on that aspects. Will update once I have some interesting workarounds.
Thanks for reading…
Reference:
https://medium.com/@kamaljp/text-to-video-pipeline-python-automation-using-open-ai-models-f4341555c8d9
0 comments:
Post a Comment