Error handling is essential to creating mobile apps since it makes sure that even in the face of unforeseen problems, your Flutter app will run smoothly and be user-friendly. This in-depth book will cover best practices and code samples for handling mistakes efficiently and graciously as it explores various error-handling mechanisms in Flutter. By the time you’re finished reading this article, you’ll have a solid grasp of Flutter’s error handling and be prepared to create dependable apps. Let’s start now!
1️. Recognising Errors in Flutter
As with any programming language or framework, mistakes can happen when developing using Flutter. Building dependable and stable programs requires a thorough understanding of these problems. Let’s explore the many fault categories that might happen in Flutter apps:
- Exceptions are objects that indicate failures that happen when code is being executed in Dart, the programming language used by Flutter. Dart throws an exception when a special circumstance occurs, such as trying to divide by zero, accessing a null reference, or calling a method on an object that doesn’t allow it. The program may be terminated if the exception is not caught and handled appropriately.
- Errors In
addition to exceptions, Dart also contains a class of objects known as
errors. Contrary to exceptions, errors typically point out serious
problems that shouldn’t be identified and fixed since they might cause
erratic program behavior or crashes.
OutOfMemoryErrorandStackOverflowError. are frequent faults. To ensure that the program crashes and prevent unpredictable behavior, errors should be considered fatal and left uncaught. - Null Reference Errors The
null reference error, commonly referred to as a Null Pointer Exception,
is one of the most frequent mistakes made in programming. It happens
when you attempt to use a property or method on an object that is null,
or one that does not really reference any instance. To securely access
properties or invoke methods on possible
nullobjects in Dart and avoid null reference issues, use the null-aware operator. (?.)
String? name; // Nullable variable
print(name?.length); // Using ?. to avoid null reference error4. Assertion Failures: Assertions may be used in Flutter to check certain conditions when developing. When an assertion statement evaluates to false,
it results in an assertion failure. Typically used for debugging,
assertions can be turned off in production builds to improve efficiency.
assert(someCondition, "This will be displayed if someCondition is false");5. Asynchronous Errors:
You often use asynchronous activities in Flutter apps, such as sending
network queries or retrieving data from databases. An unhandled
exception that results from an error occurring during an asynchronous
action without being detected may cause unexpected application behavior
or crashes. try-catch blocks or the Future API can be used to handle asynchronous failures.
try {
  var result = await someAsyncOperation();
  // Use the result
} catch (e) {
  // Handle the asynchronous error
}
2. What Makes Error Handling Critical?
Error management is an essential component of Flutter app development and is very important for the following reasons:
- Enhancing User Experience: Users may experience unexpected crashes or behavior when issues occur during program execution. Error management aids in managing these issues and provides users with helpful error messages. Users will have a more satisfying and user-friendly experience if error messaging and handling are done correctly and users are informed about what went wrong and how to fix it.
- Keeping Apps From Crashing: Unhandled errors and exceptions can cause app crashes, which can frustrate users and result in possible data loss. You may avoid the application from suddenly stopping and provide options for recovery or fallback methods by implementing good error handling.
- Maintaining App Stability: Your Flutter app’s overall stability is enhanced by robust error handling. You may avoid cascade failures and make sure the app works even in difficult circumstances by foreseeing future issues and gently addressing them.
- Debugging is made simpler: by error handling, which facilitates the identification and diagnosis of problems throughout the development and testing phases. When exceptions arise, well-designed error handling aids in identifying the underlying cause, making it simpler to resolve defects and raise the application’s dependability.
- Graceful Recovery from Failures: Some mistakes may be reversible or permit the use of backup plans. For instance, error handling might start a retry mechanism or switch to a cached data source if a network request fails. Correct error handling can improve the likelihood of recovering from temporary failures and enhancing user experience.
- Logging and error reporting: When errors are handled correctly, you may build logging methods that capture when mistakes and exceptions occur in actual use. These logs may be gathered and aggregated by error reporting technologies, giving users insightful information about their most pressing problems. You may use this data to decide which enhancements and problem fixes to include in further app upgrades.
- Null Safety and Stability: Now that Flutter has null safety, it’s even more important to handle null references appropriately. Your code will be more predictable and stable if you use null-aware operators and adhere to the recommended null safety procedures.
- Security and compliance: In some applications, ensuring compliance with security and privacy laws requires effective error handling. For instance, improper handling of sensitive data mistakes might result in data breaches and security flaws.
3. Try-Catch Basic Error Handling
Try-catch blocks are one of the core error-handling strategies used in Dart. These building elements enable programmers to manage exceptions, prevent crashes and provide fallback options in case of problems.
The Try-Catch Block’s Anatomy The “try” and the “catch” blocks are the two primary parts of try-catch blocks. The code that could throw an exception is contained in the try block. If an exception is thrown inside of the try block, the catch block is responsible for handling it.
The “try” Block: The code that might cause an exception should be placed in the “try” block. For potentially error-prone code, it serves as a container of protection.
The “catch” Block: When an exception is raised within the try block, the catch block is put into action. It recognizes the exception and enables you to gently manage it. To fix the problem, you can take extra steps or provide the user with useful error messages.
Example: How to handle a division by zero exception: Let’s look at an example where we have a function that divides. The scenario where the denominator is zero, which would lead to a division by zero exception, will be handled with a try-catch block.
void divideNumbers(int numerator, int denominator) {
  try {
    double result = numerator / denominator;
    print('Result of division: $result');
  } catch (e) {
    print('Error: $e');
    print('Cannot perform the division.');
  }
}
void main() {
int num1 = 10;
int num2 = 0;
divideNumbers(num1, num2);
}In this example, if we set num2
to 0, the catch block will catch a division by zero exception. Instead
of crashing the app, the catch block will display an error message,
preventing any disruption to the user experience.
Try-catch blocks allow Flutter developers to gracefully manage errors, improve user experience, and prevent app crashes, improving the stability and usability of their apps.
4. Dealing with Asynchronous Errors
To maintain the dependability of your code, resolving failures in asynchronous processes is crucial while developing Flutter apps. Asynchronous tasks, including reading data from databases or APIs, provide particular problems for managing errors. Futures and Streams, two typical asynchronous structures in Flutter, will be used to examine how to manage mistakes in asynchronous activities in this section.
Understanding Asynchronous Error Management: Traditional try-catch error management is problematic for asynchronous activities since they run independently from the main program flow. Instead, for efficient error management, we employ the mechanisms offered by Futures and Streams to manage mistakes and propagate them to the proper components.
Future error handling:
Futures represent a single value that might not be immediately
accessible. The Future can end when an asynchronous action is finished
with a value or an error. The .catchError() function is used to detect and respond to errors that occur while a future is being executed.
Stream error handling: Streams are collections of asynchronous events that emit data continuously over time. The .listen() function is used to subscribe to events when working with streams. We may use the .onError() function to catch and deal with any faults that happen during the life of a stream.
Example of Future and Stream Error Handling:
Let’s use future and stream operations to demonstrate error handling:
Future<int> fetchUserData() async {
  await Future.delayed(Duration(seconds: 2)); // Simulating an async operation
  // Uncomment the line below to trigger an error
  // throw Exception('Error fetching user data');
  return 42; // Simulating a successful response
}

void main() {
  // Handling errors in a Future
  fetchUserData()
      .then((value) => print('User data: $value'))
      .catchError((error) => print('Error fetching user data: $error'));

  // Handling errors in a Stream
  Stream<int>.periodic(Duration(seconds: 1), (count) => count)
      .map((count) {
        // Uncomment the line below to trigger an error
        // if (count == 2) throw Exception('Error in stream');
        return count;
      })
      .listen(
        (data) => print('Stream data: $data'),
        onError: (error) => print('Error in stream: $error'),
      );
}
The fetchUserData() function replicates an asynchronous action using a Future in this example. The.catchError() function will handle the error and provide an error message if the line that throws the error is uncommented.
The .onError() function is used in the Stream example to handle faults that may arise throughout the life of the stream.
5. Using ErrorWidgets to handle global errors
Setting up systems to detect unhandled exceptions and faults that may occur anywhere in your program is known as global error handling. These errors may be intercepted and handled with custom ErrorWidgets, preventing the app from crashing and guaranteeing a positive user experience.
ErrorWidgets and FlutterError: In Flutter, the framework invokes the FlutterError.onError
method whenever an unhandled exception occurs. ErrorWidgets may be used
to customize this method and offer your own unique error-handling
logic. ErrorWidgets are widgets that warn the user of errors.
Implementing Global Error Handling: Let’s use a customized ErrorWidget to demonstrate how to configure global error handling:
import 'package:flutter/material.dart';

void main() {
  runApp(MyApp());
}

class MyApp extends StatelessWidget {
  @override
  Widget build(BuildContext context) {
    return MaterialApp(
      title: 'Global Error Handling',
      home: ErrorHandlerWidget(
        child: MyHomePage(),
      ),
    );
  }
}

class MyHomePage extends StatelessWidget {
  @override
  Widget build(BuildContext context) {
    return Scaffold(
      appBar: AppBar(title: Text('Global Error Handling Example')),
      body: Center(
        child: ElevatedButton(
          onPressed: () {
            // Uncomment the line below to trigger an error
            // throw Exception('Simulated error');
            Navigator.push(
              context,
              MaterialPageRoute(builder: (context) => SecondPage()),
            );
          },
          child: Text('Trigger Error'),
        ),
      ),
    );
  }
}

class SecondPage extends StatelessWidget {
  @override
  Widget build(BuildContext context) {
    return Scaffold(
      appBar: AppBar(title: Text('Second Page')),
      body: Center(
        child: ElevatedButton(
          onPressed: () {
            // Uncomment the line below to trigger an error
            // throw Exception('Another simulated error');
          },
          child: Text('Trigger Another Error'),
        ),
      ),
    );
  }
}

class ErrorHandlerWidget extends StatefulWidget {
  final Widget child;

  ErrorHandlerWidget({required this.child});

  @override
  _ErrorHandlerWidgetState createState() => _ErrorHandlerWidgetState();
}

class _ErrorHandlerWidgetState extends State<ErrorHandlerWidget> {
  // Error handling logic
  void onError(FlutterErrorDetails errorDetails) {
    // Add your error handling logic here, e.g., logging, reporting to a server, etc.
    print('Caught error: ${errorDetails.exception}');
  }

  @override
  Widget build(BuildContext context) {
    return ErrorWidgetBuilder(
      builder: (context, errorDetails) {
        // Display a user-friendly error screen
        return Scaffold(
          appBar: AppBar(title: Text('Error')),
          body: Center(
            child: Text('Something went wrong. Please try again later.'),
          ),
        );
      },
      onError: onError,
      child: widget.child,
    );
  }
}

class ErrorWidgetBuilder extends StatefulWidget {
  final Widget Function(BuildContext, FlutterErrorDetails) builder;
  final void Function(FlutterErrorDetails) onError;
  final Widget child;

  ErrorWidgetBuilder({
    required this.builder,
    required this.onError,
    required this.child,
  });

  @override
  _ErrorWidgetBuilderState createState() => _ErrorWidgetBuilderState();
}

class _ErrorWidgetBuilderState extends State<ErrorWidgetBuilder> {
  @override
  void initState() {
    super.initState();
    // Set up global error handling
    FlutterError.onError = widget.onError;
  }

  @override
  Widget build(BuildContext context) {
    return widget.child;
  }
}
In this example, we create a simple Flutter app with two pages (MyHomePage and SecondPage). The ErrorHandlerWidget wraps the entire app, and the ErrorWidgetBuilder is used to handle errors and display a user-friendly error screen.
When
you run the app, you’ll see a button on the home page that allows you
to trigger an error by uncommenting the line that throws an exception.
The global error-handling logic will catch the error in the ErrorHandlerWidget and displayed on the error screen.
With
global error handling using ErrorWidgets, you can provide a consistent
and smooth user experience even when unexpected errors occur in your
Flutter app. Additionally, you can use the error-handling logic in onError to perform logging or report errors to a server for further analysis.
6. Handling Platform-specific Errors
The platforms that Flutter apps may operate on include Android, iOS, web, desktop, etc. Every platform might experience various issues or behave differently. Platform-specific mistakes must be graciously handled in order to deliver a consistent and user-friendly experience.
Finding the Current Platform: The Platform class from the dart:io
library may be used with Flutter to find the Current Platform. This
class can determine the platform, allowing you to customize your error
messages.
Example: Let’s use a platform-specific error handling example to show how to handle such issues and display such error messages:
import 'package:flutter/material.dart';
import 'dart:io' show Platform;

void main() {
  runApp(MyApp());
}

class MyApp extends StatelessWidget {
  @override
  Widget build(BuildContext context) {
    return MaterialApp(
      title: 'Platform-specific Error Handling',
      home: MyHomePage(),
    );
  }
}

class MyHomePage extends StatelessWidget {
  void handlePlatformError(BuildContext context) {
    String errorMessage;
    if (Platform.isAndroid) {
      errorMessage = 'This feature is not available on Android.';
    } else if (Platform.isIOS) {
      errorMessage = 'This feature is not available on iOS.';
    } else if (Platform.isMacOS) {
      errorMessage = 'This feature is not available on macOS.';
    } else if (Platform.isWindows) {
      errorMessage = 'This feature is not available on Windows.';
    } else if (Platform.isLinux) {
      errorMessage = 'This feature is not available on Linux.';
    } else if (Platform.isFuchsia) {
      errorMessage = 'This feature is not available on Fuchsia.';
    } else {
      errorMessage = 'This feature is not supported on your platform.';
    }

    showDialog(
      context: context,
      builder: (context) => AlertDialog(
        title: Text('Error'),
        content: Text(errorMessage),
        actions: [
          TextButton(
            onPressed: () => Navigator.pop(context),
            child: Text('OK'),
          ),
        ],
      ),
    );
  }

  @override
  Widget build(BuildContext context) {
    return Scaffold(
      appBar: AppBar(title: Text('Platform-specific Error Handling')),
      body: Center(
        child: ElevatedButton(
          onPressed: () => handlePlatformError(context),
          child: Text('Show Platform Error'),
        ),
      ),
    );
  }
}
In this illustration, we build a straightforward Flutter application with a button that causes a platform-specific error. The handlePlatformError method uses Platform.isX attributes to determine the current platform, and then it displays the appropriate error message in an AlertDialog based on the platform.
The “Show Platform Error” button will display an error message specific to your current platform when you launch the app and click it. Using an Android emulator, for instance, will result in the error message “This feature is not available on Android.”
You can make sure your Flutter app delivers a consistent and user-friendly experience across many platforms by handling platform-specific issues and supplying pertinent error messages.
7. Handling Network Errors
whether developing a Flutter app or handling network faults is essential to provide users with a smooth experience whether they run across connectivity problems or server difficulties. In this part, we’ll look at how to deal with network issues and provide users with the right kind of feedback when there are server or network issues.
Example 1: Handling Network Unavailability:
Let’s show you how to identify network unavailability and inform the user that there is “No Internet Connection”:
import 'package:flutter/material.dart';
import 'package:connectivity/connectivity.dart';

void main() {
  runApp(MyApp());
}

class MyApp extends StatelessWidget {
  @override
  Widget build(BuildContext context) {
    return MaterialApp(
      title: 'Network Error Handling',
      home: MyHomePage(),
    );
  }
}

class MyHomePage extends StatelessWidget {
  Future<void> checkInternetConnection(BuildContext context) async {
    var connectivityResult = await Connectivity().checkConnectivity();
    if (connectivityResult == ConnectivityResult.none) {
      // Display a "No Internet Connection" message
      showDialog(
        context: context,
        builder: (context) => AlertDialog(
          title: Text('No Internet Connection'),
          content: Text('Please check your internet connection and try again.'),
          actions: [
            TextButton(
              onPressed: () => Navigator.pop(context),
              child: Text('OK'),
            ),
          ],
        ),
      );
    } else {
      // Perform the network request
      // ...
    }
  }

  @override
  Widget build(BuildContext context) {
    return Scaffold(
      appBar: AppBar(title: Text('Network Error Handling')),
      body: Center(
        child: ElevatedButton(
          onPressed: () => checkInternetConnection(context),
          child: Text('Check Internet Connection'),
        ),
      ),
    );
  }
}
In this illustration, the connectivity package is used to examine the status of the internet connection. We show an AlertDialog with a “No Internet Connection” message if the connection is unreliable (ConnectivityResult.none), If an internet connection is accessible, you can execute the network request as necessary.
Example 2: Handling Server Errors:
Let’s
now illustrate how to deal with server failures, such 404 Not Found or
500 Internal Server Error, and show users the appropriate error
messages.
import 'package:flutter/material.dart';
import 'package:http/http.dart' as http;

void main() {
  runApp(MyApp());
}

class MyApp extends StatelessWidget {
  @override
  Widget build(BuildContext context) {
    return MaterialApp(
      title: 'Server Error Handling',
      home: MyHomePage(),
    );
  }
}

class MyHomePage extends StatelessWidget {
  Future<void> fetchData() async {
    try {
      // Perform the network request
      final response = await http.get(Uri.parse('https://example.com/api/data'));

      if (response.statusCode == 200) {
        // Handle successful response
        // ...
      } else {
        // Handle server error and display appropriate message
        showDialog(
          context: context,
          builder: (context) => AlertDialog(
            title: Text('Server Error'),
            content: Text('An error occurred while fetching data from the server.'),
            actions: [
              TextButton(
                onPressed: () => Navigator.pop(context),
                child: Text('OK'),
              ),
            ],
          ),
        );
      }
    } catch (e) {
      // Handle other errors, such as network issues
      print('Error: $e');
      showDialog(
        context: context,
        builder: (context) => AlertDialog(
          title: Text('Error'),
          content: Text('An error occurred. Please try again later.'),
          actions: [
            TextButton(
              onPressed: () => Navigator.pop(context),
              child: Text('OK'),
            ),
          ],
        ),
      );
    }
  }

  @override
  Widget build(BuildContext context) {
    return Scaffold(
      appBar: AppBar(title: Text('Server Error Handling')),
      body: Center(
        child: ElevatedButton(
          onPressed: () => fetchData(),
          child: Text('Fetch Data'),
        ),
      ),
    );
  }
}
In this example, we’ll use the http
package to send a fictitious API endpoint a network request. If the
server sends back a 200 status code for a successful response, we handle
the successful data. Instead, we display an AlertDialogthe relevant error message if the server returns an error (status code other than 200).
A general “An error occurred” message will be displayed whenever a network request-related error, such as a network problem, is encountered. Message: “Please try again later.”
8. Reporting and Error Logging
Recording errors, exceptions, and crashes that happen in your program are known as error logging. This data is useful for identifying problems and comprehending how they affect consumers. Error reporting, on the other hand, involves sending error data to a server or cloud platform where it may be analyzed and compiled for developers to evaluate.
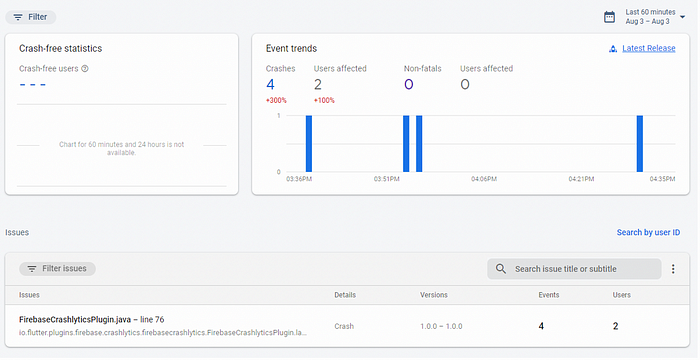
Example: Integrating Firebase Crashlytics with Error Logging: We’ll walk you through integrating Firebase Crashlytics to record and report failures in your Flutter app in this example:
- Create a Firebase project in Flutter:
- To create and include a new Firebase project into your Flutter app using the Firebase SDK, adhere to the official Firebase guide.
2. Crashlytics Firebase plugin addition:
- In your
pubspec.yamlfile, add thefirebase_crashlyticsplugin:
dependencies:
  flutter:
    sdk: flutter
  firebase_core:
  firebase_crashlytics:
3. Initialize Firebase Crashlytics:
- In your app’s entry point (usually
main.dart), initialize Firebase Crashlytics:
import 'package:flutter/material.dart';
import 'package:firebase_core/firebase_core.dart';
import 'package:firebase_crashlytics/firebase_crashlytics.dart';

void main() async {
  WidgetsFlutterBinding.ensureInitialized();
  await Firebase.initializeApp();
  FirebaseCrashlytics.instance.setCrashlyticsCollectionEnabled(true);
  runApp(MyApp());
}
4. Implement Error Logging:
- Whenever you want to log an error, use
FirebaseCrashlytics.instance.recordError():
try {
  // Your code that may throw an exception
} catch (e, stackTrace) {
  // Log the error using Firebase Crashlytics
  FirebaseCrashlytics.instance.recordError(e, stackTrace);
}
5. View Crash Reports:
- Your Firebase console will automatically receive crash reports. Visit the “Crashlytics” section of the Firebase console to see them.
9. Individualised Error Handling Techniques
Custom error handling entails modifying error handling algorithms to address fault circumstances unique to a certain app or to give consumers specialized feedback. This may entail dealing with mistakes that are exclusive to a given domain, displaying unique error panels, or interacting with particular error reporting systems.
Custom error handling for a shopping app, for instance:
Let’s
give an example of bespoke error handling for a shopping app, handling
cart-related issues and showing customers the proper messages:
import 'package:flutter/material.dart';

void main() {
  runApp(MyApp());
}

class MyApp extends StatelessWidget {
  @override
  Widget build(BuildContext context) {
    return MaterialApp(
      title: 'Custom Error Handling',
      home: MyShoppingPage(),
    );
  }
}

class MyShoppingPage extends StatefulWidget {
  @override
  _MyShoppingPageState createState() => _MyShoppingPageState();
}

class _MyShoppingPageState extends State<MyShoppingPage> {
  List<String> cartItems = ['Item A', 'Item B', 'Item C'];

  void addToCart(String item) {
    setState(() {
      cartItems.add(item);
    });
  }

  void removeFromCart(String item) {
    if (!cartItems.contains(item)) {
      // Custom handling for cart item not found
      showDialog(
        context: context,
        builder: (context) => AlertDialog(
          title: Text('Error'),
          content: Text('Item not found in the cart.'),
          actions: [
            TextButton(
              onPressed: () => Navigator.pop(context),
              child: Text('OK'),
            ),
          ],
        ),
      );
    } else {
      setState(() {
        cartItems.remove(item);
      });
    }
  }

  @override
  Widget build(BuildContext context) {
    return Scaffold(
      appBar: AppBar(title: Text('Custom Error Handling')),
      body: ListView.builder(
        itemCount: cartItems.length,
        itemBuilder: (context, index) {
          return ListTile(
            title: Text(cartItems[index]),
            trailing: IconButton(
              icon: Icon(Icons.delete),
              onPressed: () => removeFromCart(cartItems[index]),
            ),
          );
        },
      ),
      floatingActionButton: FloatingActionButton(
        onPressed: () {
          // Simulating an error for an item not found in the cart
          removeFromCart('Item D');
        },
        child: Icon(Icons.remove),
      ),
    );
  }
}
In this case, we develop a shopping application that enables users to add and delete goods from their shopping carts. The removeFromCart function now uses a unique error-handling method that we developed ourselves. We show AlertDialog a unique error message (“Item not found in the cart.”) whenever the user attempts to delete an item that is not in the cart.
This retail app’s customized error handling caters to a particular use case that is peculiar to the app’s industry. To improve user experience and handle unique cases, you may build a variety of bespoke error-handling algorithms depending on the needs of your app.
10. Flutter’s Best Practises for Handling Errors
For a Flutter app to be stable, dependable, and to provide a good user experience, error management is essential. You may manage problems in your Flutter apps more effectively by following these recommended practices:
- User-Friendly Error Messages: Display concise and informative error messages to users when an issue occurs. Keep technical information that people might not comprehend out of sight. Instead, give them useful advice on how to go forward or what they can do to remedy the problem.
- Try-catch Blocks Should Be Used for Exceptions: Try-catch blocks can be used to capture and gracefully manage exceptions in code that is prone to them. By doing so, you may avoid app crashes and properly handle problems.
- Futures and Streams are Used to Handle Asynchronous Errors:
Pay close attention to how errors are handled while doing asynchronous
operations utilizing streams and futures. To properly manage failures,
Futures should use
.catchError()and Streams should useonError(). - Implement global error handling: Create techniques for catching errors and unhandled exceptions uniformly across all displays. This guarantees a seamless user experience and helps with problem-solving.
- Error logging should be used to record: error details for monitoring and troubleshooting reasons. Identify major issues in production by logging and reporting failures using tools like Firebase Crashlytics.
- Create Custom Error Handling for Particular Situations: Customise error handling to meet the needs of your app. For app-specific failures or circumstances, provide custom error messages and handling logic.
- Identify network connectivity issues and server problems: gracefully handle network-related issues including network outages or server problems. Users should be made aware of connectivity problems and given pertinent error messages.
- Graceful Degradation for Feature Unavailability: Handle feature unavailability gently if some features rely on platform-specific functionality or external services. When functionalities are not available due to external circumstances or are not supported by the user’s current platform, users should be notified.
- Keep Force Crashes Out of Production: While force crashes can be helpful for testing and debugging, keep them out of builds intended for usage in actual production. Force crashes ruin the user experience and could get bad feedback.
- Test Error circumstances: Make sure your error handling logic functions as intended in a variety of error circumstances by thoroughly testing it. To make sure your app responds politely to failures, test both expected and unexpected ones.
Keep in mind that error management is a continual process and that improving your error-handling techniques based on user feedback and app analytics will enhance your users’ app experiences.
11. Using Unit Tests to Test Error Scenarios
Small, isolated code units, such as functions or methods, are tested for functioning using unit tests. You will develop test cases that replicate various error circumstances and check that the error handling logic reacts appropriately when you write unit tests for error handling.
Example: Unit Testing Error Handling:
Let’s illustrate how to create unit tests using the test package to test various error scenarios and evaluate error-handling behavior:
import 'package:flutter_test/flutter_test.dart';

// Function to test: Division function
double divideNumbers(int numerator, int denominator) {
  if (denominator == 0) {
    throw Exception('Division by zero is not allowed.');
  }
  return numerator / denominator;
}

void main() {
  // Test case 1: Testing successful division
  test('Test successful division', () {
    expect(divideNumbers(10, 2), equals(5));
  });

  // Test case 2: Testing division by zero
  test('Test division by zero', () {
    try {
      divideNumbers(10, 0);
      // The line below should not be reached.
      fail('Expected an exception to be thrown.');
    } catch (e) {
      expect(e, isA<Exception>());
      expect(e.toString(), contains('Division by zero is not allowed.'));
    }
  });

  // Test case 3: Testing division with negative numbers
  test('Test division with negative numbers', () {
    expect(divideNumbers(-10, 2), equals(-5));
  });
}
We have a function called divideNumbers that divides numbers in our case. Three unit tests were created to address various scenarios:
- Test case 1: Tests a productive division against the anticipated results.
- Test case 2: Tests the case in which the denominator is 0, which should cause an exception to be thrown along with the necessary error message.
- Test case 3: Division is tested with negative numbers.
You can verify that the divideNumbers method handles various circumstances appropriately and throws exceptions as intended by running these unit tests.
In order to maintain code quality and make sure your software reacts effectively to various error cases, writing unit tests for error handling is crucial. It also acts as a safety net when you modify your codebase since you can easily spot any errors that arise while developing.
Conclusion
We’ll emphasize the value of strong error handling in Flutter and how it enhances the user experience as we draw to a close. By employing good error-handling techniques and adhering to best practices, you may create dependable and user-friendly Flutter apps.
source:
https://medium.com/@parthbhanderi01/complete-guide-to-flutter-error-handling-techniques-and-code-examples-37414dd0992f
0 comments:
Post a Comment